

 Español
 中文
 العربية
🎮 How to Create a License Pool
This article will guide you through the process of creating and setting up a license pool for in-house game accounts.
✅ Prerequisites
Before you begin:
- Configure User and PC groups if you want to restrict license pool access.
- Ensure the games intended for the license pool are already enabled and configured.
🧠 Overview
A license pool is where your center’s in-house game accounts are stored. These accounts can be borrowed by users and optionally restricted to specific PC or user groups.
When a user clicks the “Just Play” button on a client PC, they will see a list of available game accounts. Once an account is no longer in use, it becomes available for others.
🛠️ Instructions
🏗️ Creating a License Pool
- Go to Settings → Center Config → Licenses.
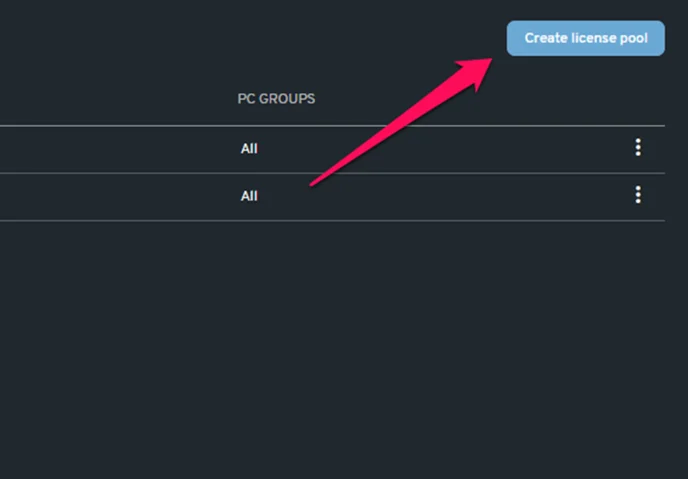
- Click the "Create license pool" button (top-right of the screen).
- Enter a name for your license pool.
- In the Games field, search or select from the dropdown list of enabled games.
- Select the PC and/or User groups that can access the pool.
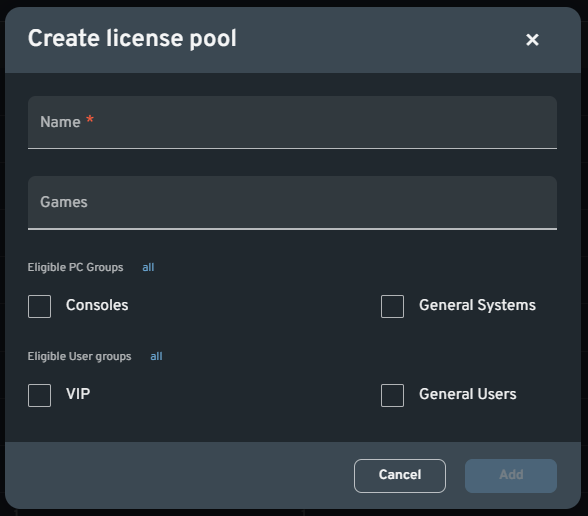
- Click "Add" to finish.
➕ Adding a License to the Pool
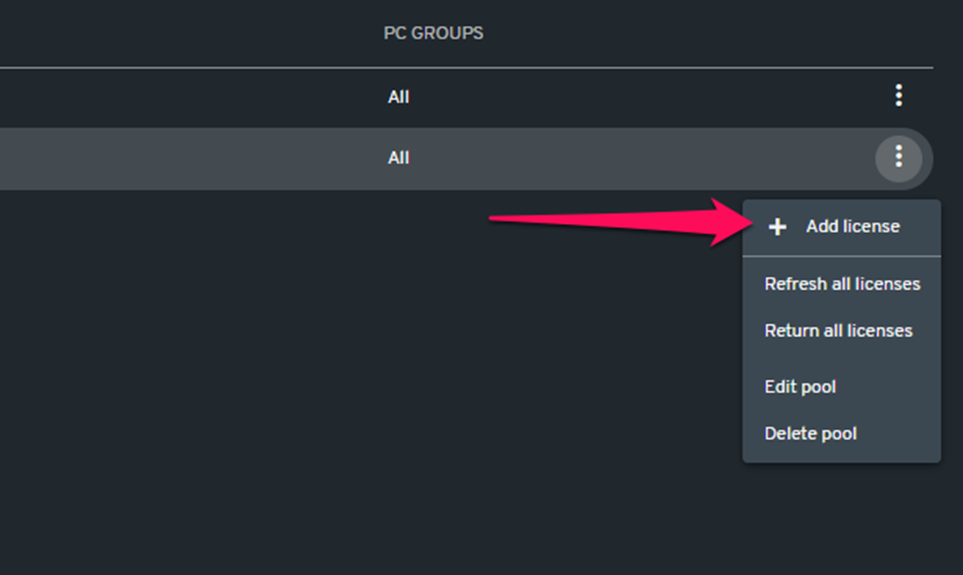
- After creating a license pool, click the three-dot menu on the right side of the pool and select "+ Add license".
- Choose the platform (e.g., Steam) in the Type field.
- Give the license a name—this helps users recognize which account they’re borrowing.
- Enter the username and password.
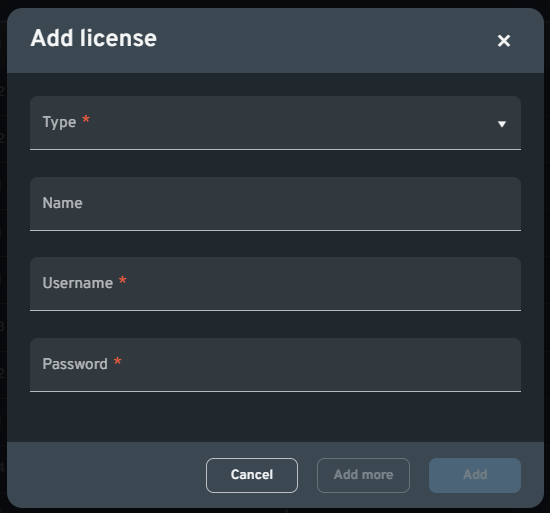
- Click "Add more" to enter additional licenses, or "Add" to finish.