

 English
 中文
 العربية
🧑💼 SAML SSO - How to Set Up ClassLink
Este artículo aún no está disponible en español. Se muestra en inglés.
Connect ClassLink LaunchPad to ggLeap so students and staff can sign in with one click — no separate ggLeap passwords required.
1. Get the ggLeap Service Provider Metadata
- Go to https://sp.ggleap.com/
- Right-click the metadata link on the page and choose "Copy link address" — you will paste this URL into ClassLink in the next step
- Optionally, also choose "Save link as…" and save the file as an XML file (useful as a fallback if ClassLink cannot fetch the URL directly)
2. Add ggLeap as a Service Provider in ClassLink
- Sign in at https://launchpad.classlink.com/ with a ClassLink administrator account
- Open the ClassLink Management Console
- Navigate to:
Single Sign-On > SAML Console > ADD NEW
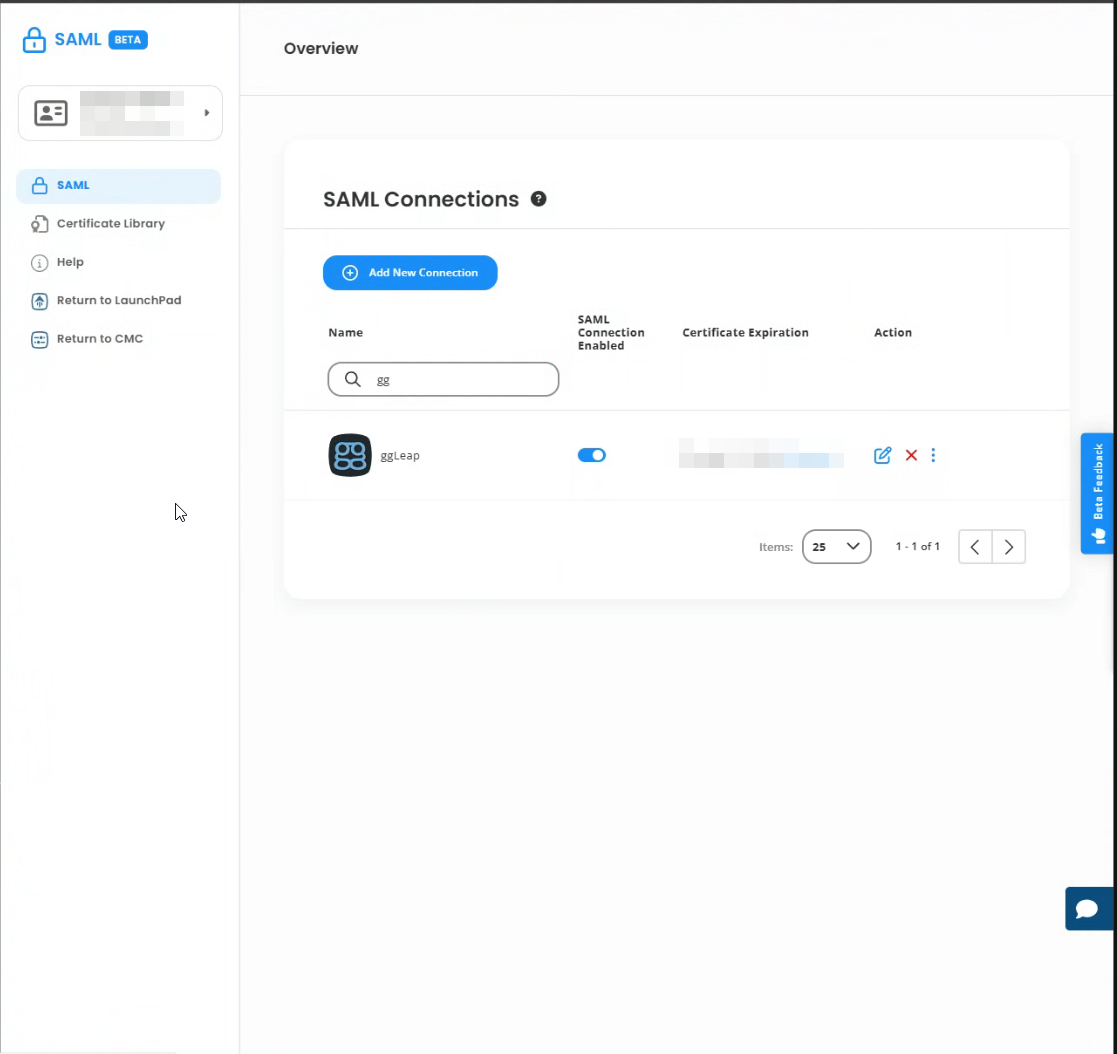
On the Add New Service Provider form, fill in:
- Name:
ggLeap SSO(or your venue name) - Metadata URL: paste the ggLeap metadata link copied in Step 1
- Login URL: leave empty (default)
- Icon URL: optional
3. 👥 Attribute Mapping
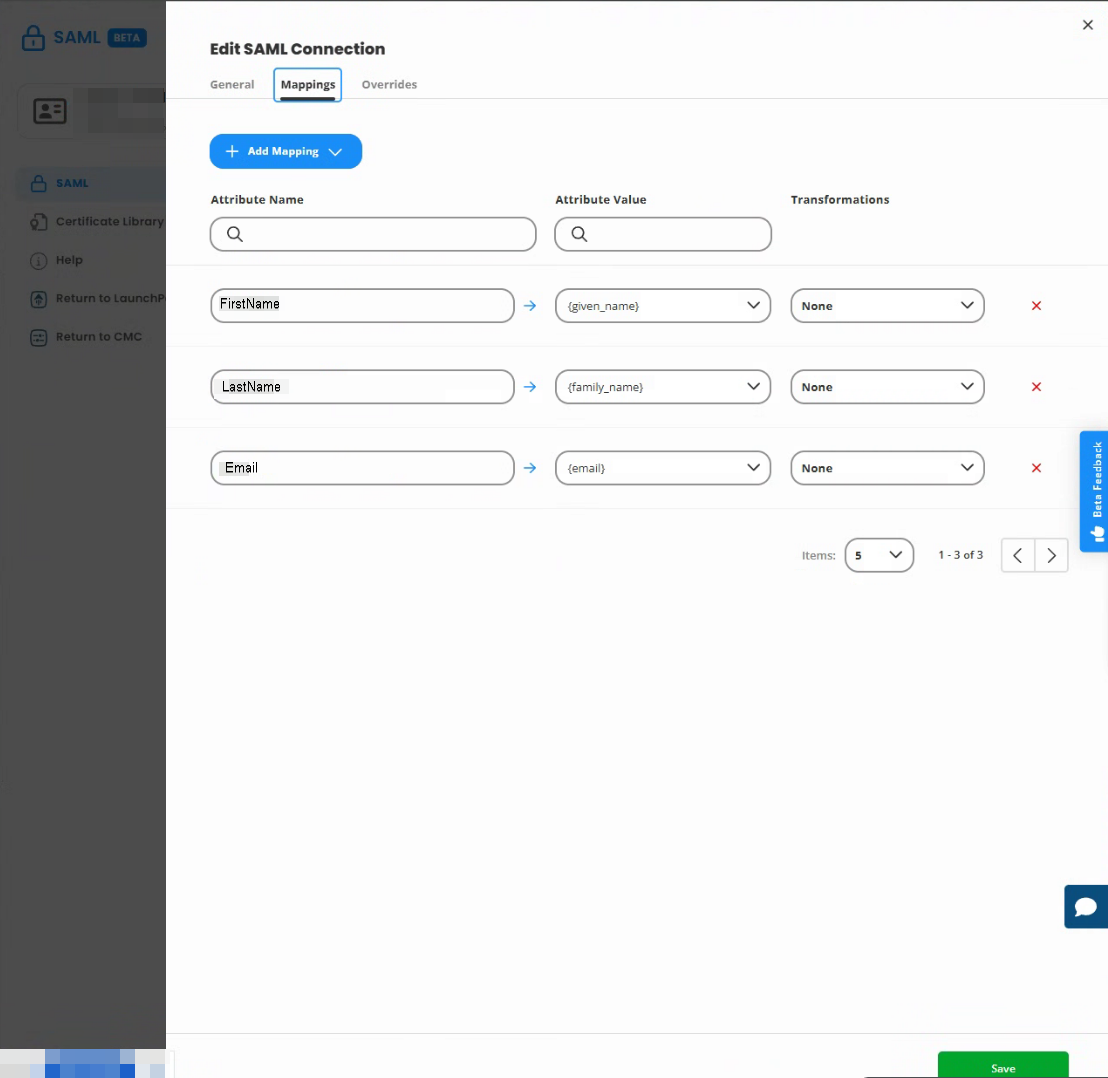
In the Attribute Mapping section of the same form, add the following mappings:
| ClassLink Attribute | App Attribute |
|---|---|
| First Name | FirstName |
| Last Name | LastName |
Email |
4. Metadata Overrides (NameID)
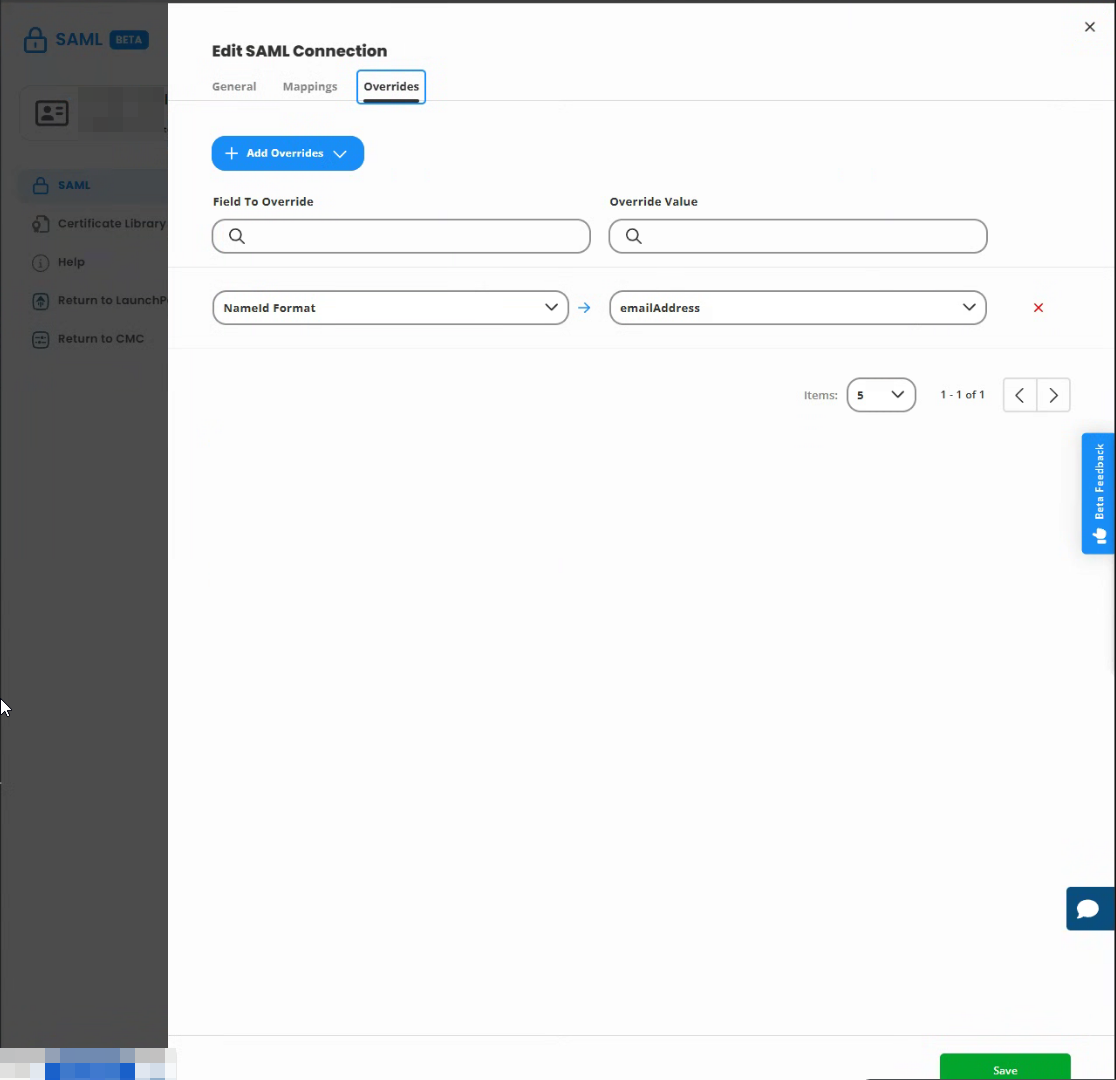
ggLeap identifies users by email address, so the SAML NameID must resolve to the user's email:
- Scroll to the Metadata Overrides section
- In the Select Fields to Override dropdown, choose NameId Format → confirm it is set to
emailAddress - In the same dropdown, choose NameId Value → select Email
- Click Add to save the Service Provider
5. Copy the IdP Metadata URL and Login URL
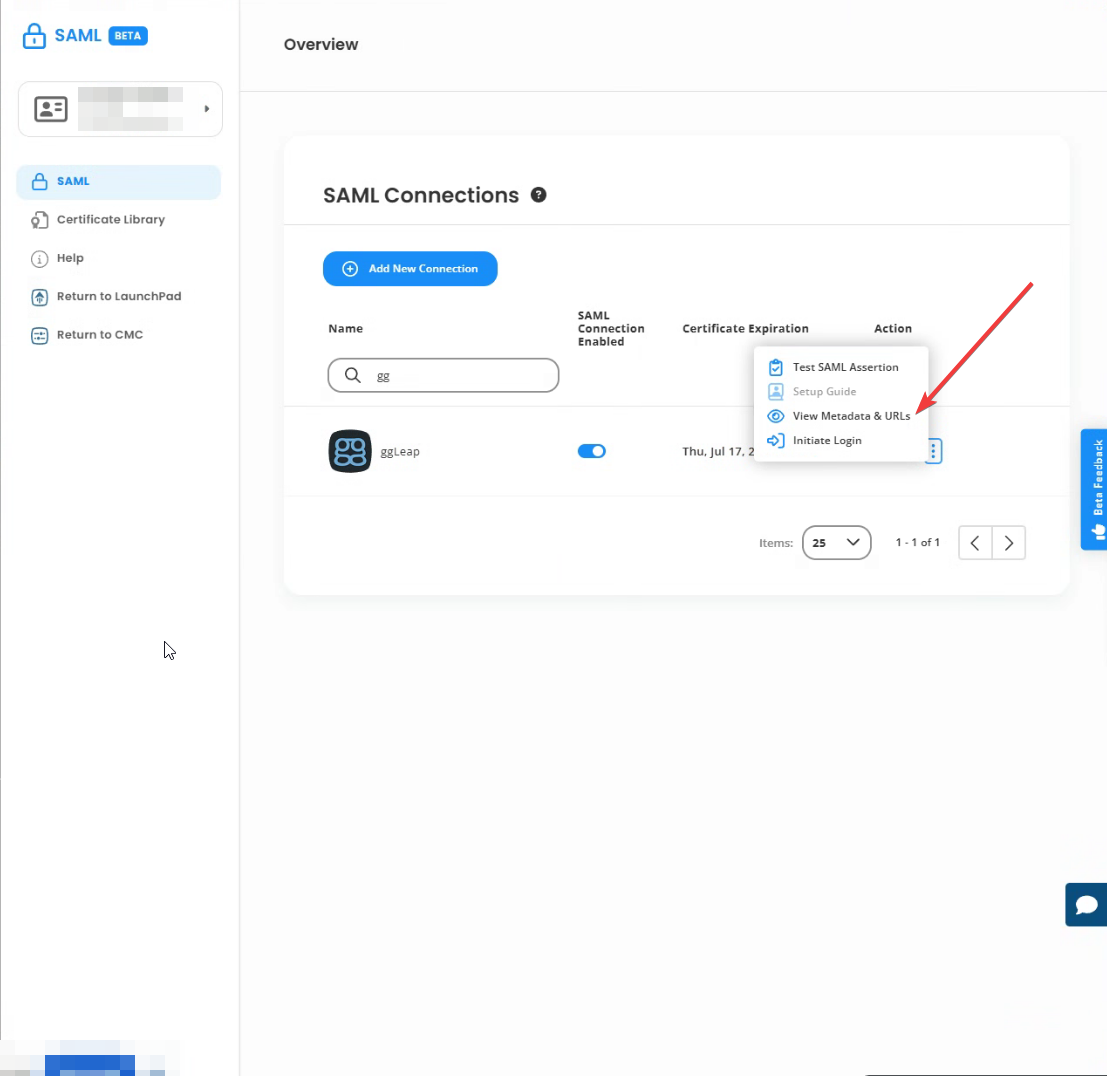
Back on the SAML Console list, locate your new ggLeap connector:
- Copy the IDP Metadata URL (clipboard icon) — you will paste this into ggLeap Web Admin in Step 7
- Click the dropdown arrow next to it and choose Copy IDP Initiate Login URL — you will use this for the LaunchPad tile in Step 6
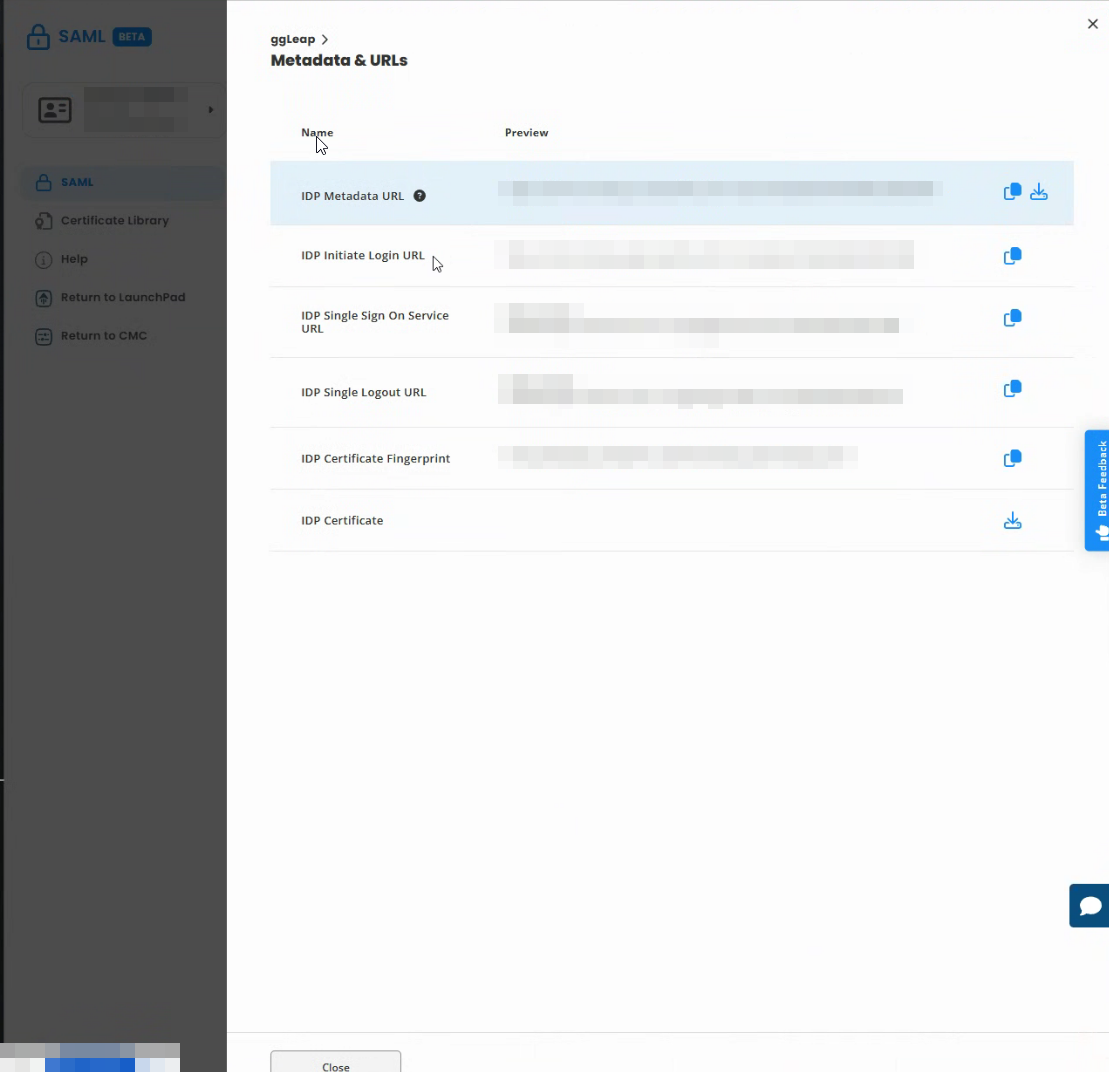
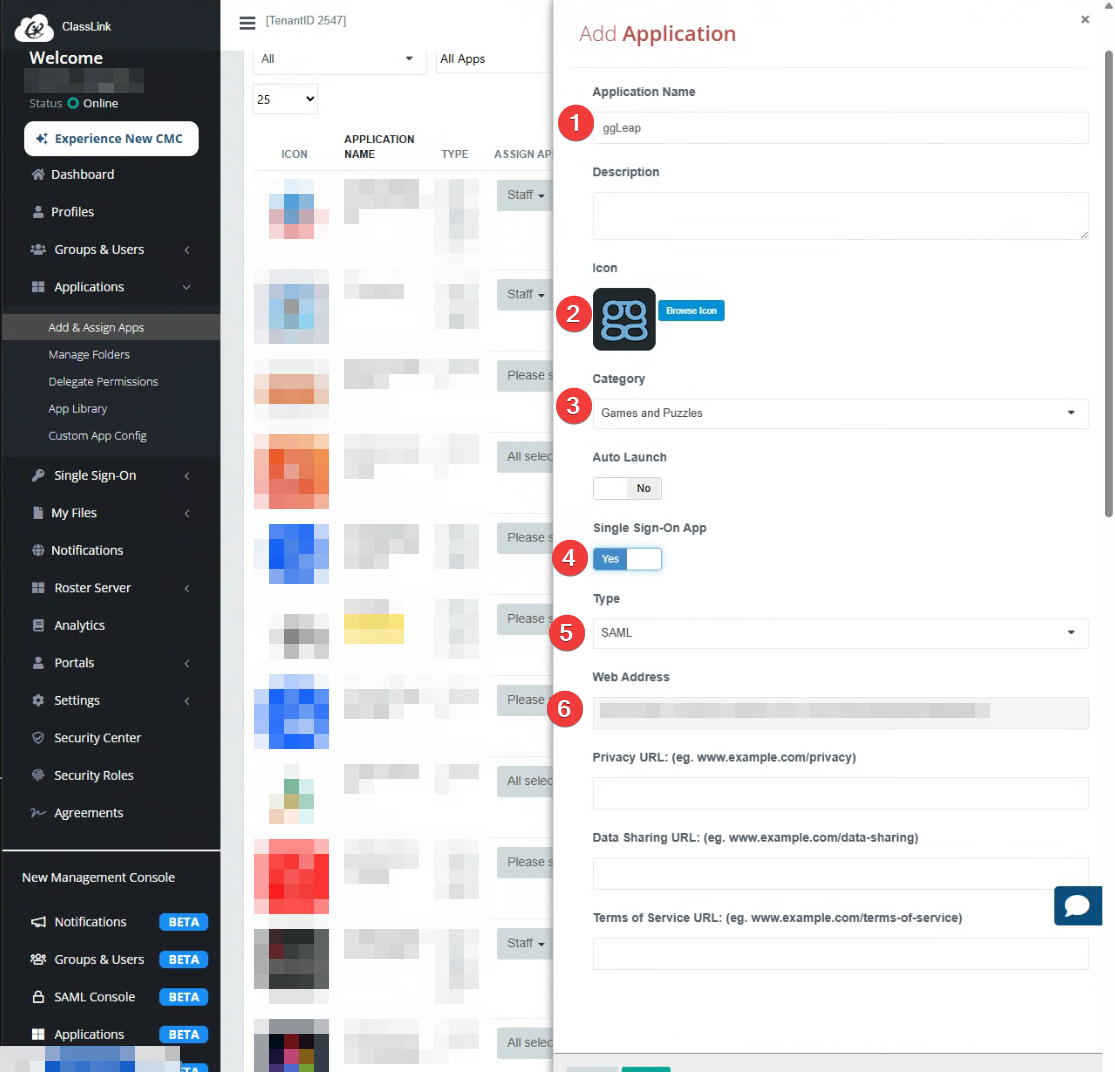
6. Create the LaunchPad App Tile
- Navigate to:
ClassLink Management Console > Applications > Add & Assign Apps > Add - Application Name:
ggLeap(this is what users will see) - Icon: upload or request a custom icon
- Single Sign-On App: switch to Yes
- Type: select SAML
- Web Address: paste the IDP Initiate Login URL copied in Step 5
- Click Save, then use Assign to publish the tile to the users, groups, or roles who need ggLeap access
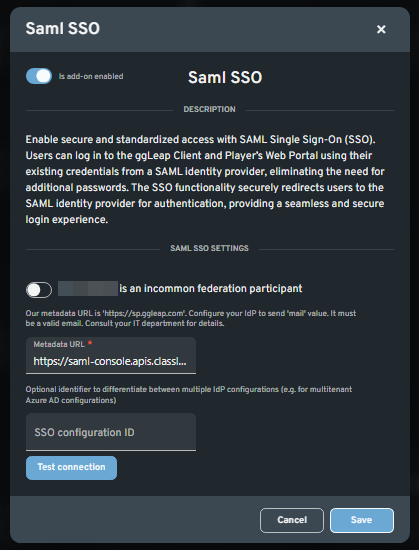
7. Configure ggLeap Web Admin
- Ensure your default environment is set to Production
- Go to the ggLeap Web Admin > User Login Setup page
- Enable Single Sign-On (SSO)
- Paste the ClassLink IDP Metadata URL from Step 5
- Click Save
8. Test the Connection
- Sign in to ClassLink LaunchPad as a test user who has been assigned the ggLeap tile
- Click the ggLeap tile and verify you land in ggLeap signed in
- Confirm the account was auto-created in ggLeap Web Admin with the correct first name, last name, and email
📝 Notes:
- The user's email must not already exist in another ggLeap center
- School districts and universities should use email addresses with their institution's domain
- A user account will be automatically created in ggLeap Web Admin upon first sign-in
- If sign-in fails, re-check Step 3 (attribute names are case-sensitive) and Step 4 (NameID must be the user's email) first — these cause the vast majority of failed setups
¿Te ha sido útil este artículo?
Más en Inicio de sesión único (SSO)
Artículos relacionados
- I'm ready to translate, but I don't see the article title to translate. Could you provide the English title you'd like me to translate to Sp
- 🔄 Respaldando y Restaurando Tus Archivos Personales (PUFs) para Máquinas de Cliente
- I don't see the article title in your message. Please provide the English title you'd like me to translate to Spanish, and I'll translate it