

 Español
 中文
 العربية
🧑💼 SAML SSO - How to Set Up ClassLink
Connect ClassLink LaunchPad to ggLeap so students and staff can sign in with one click — no separate ggLeap passwords required.
1. Get the ggLeap Service Provider Metadata
- Go to https://sp.ggleap.com/
- Right-click the metadata link on the page and choose "Copy link address" — you will paste this URL into ClassLink in the next step
- Optionally, also choose "Save link as…" and save the file as an XML file (useful as a fallback if ClassLink cannot fetch the URL directly)
2. Add ggLeap as a Service Provider in ClassLink
- Sign in at https://launchpad.classlink.com/ with a ClassLink administrator account
- Open the ClassLink Management Console
- Navigate to:
Single Sign-On > SAML Console > ADD NEW
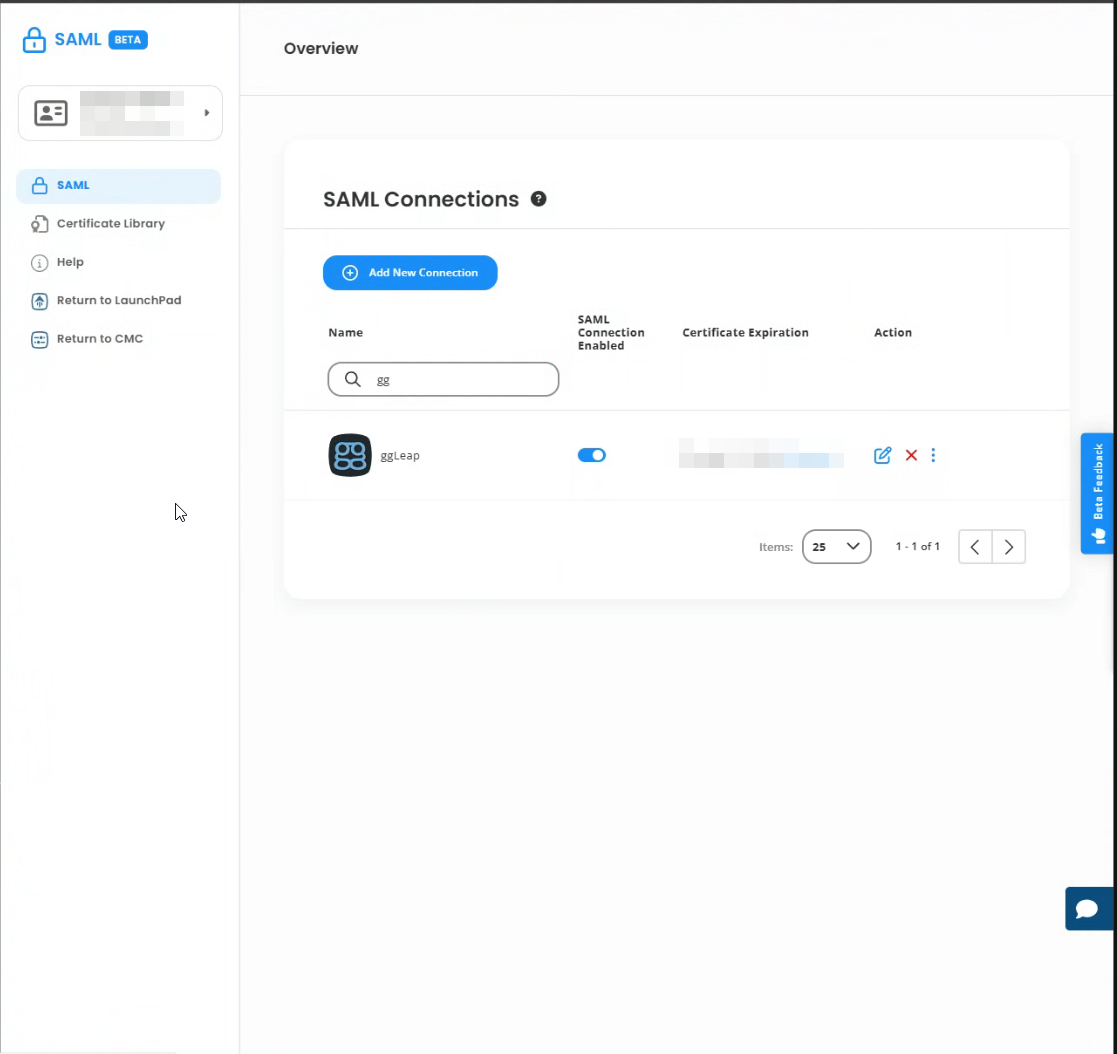
On the Add New Service Provider form, fill in:
- Name:
ggLeap SSO(or your venue name) - Metadata URL: paste the ggLeap metadata link copied in Step 1
- Login URL: leave empty (default)
- Icon URL: optional
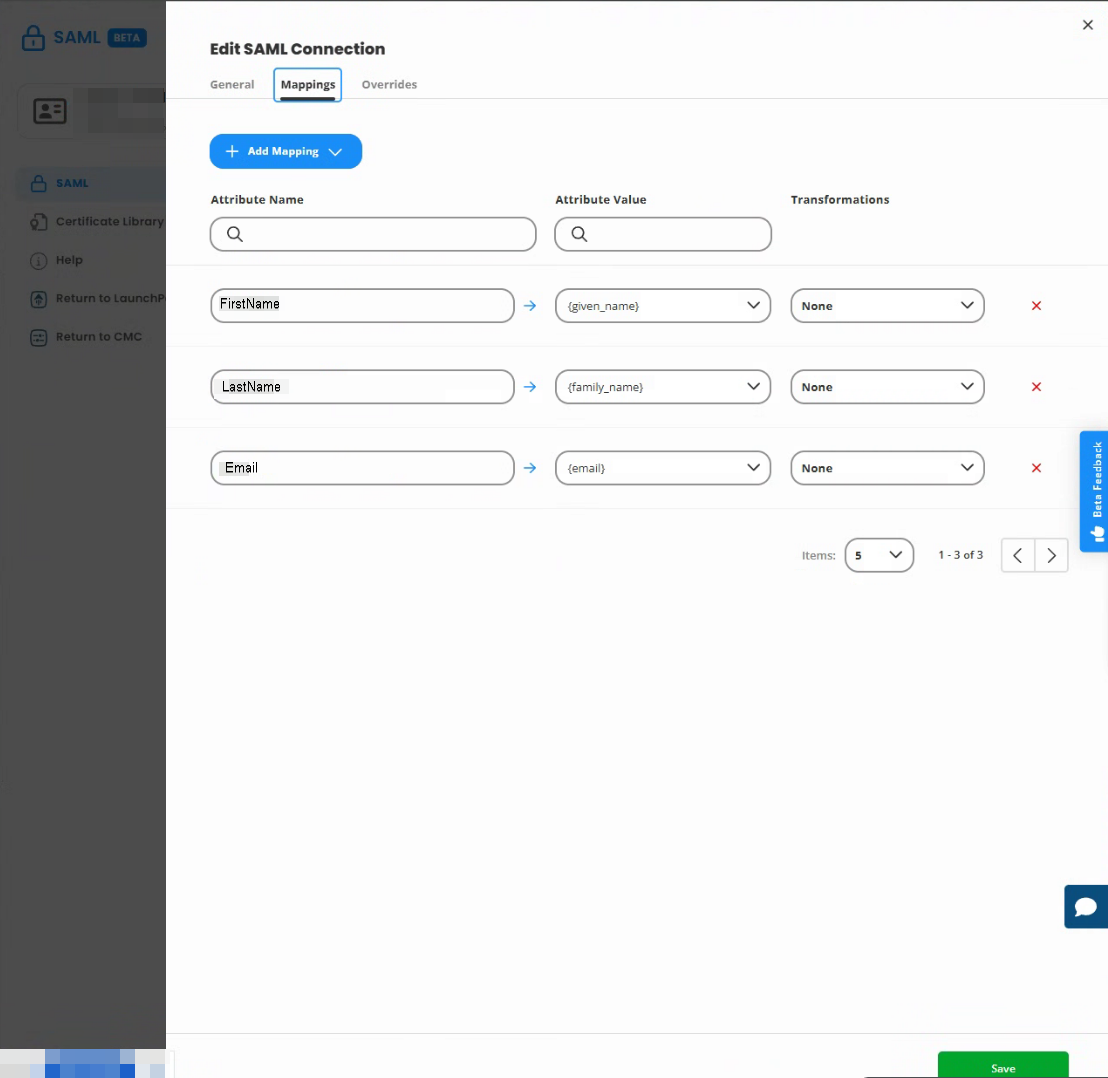
3. 👥 Attribute Mapping
In the Attribute Mapping section of the same form, add the following mappings:
| ClassLink Attribute | App Attribute |
|---|---|
| First Name | FirstName |
| Last Name | LastName |
Email |
4. Metadata Overrides (NameID)
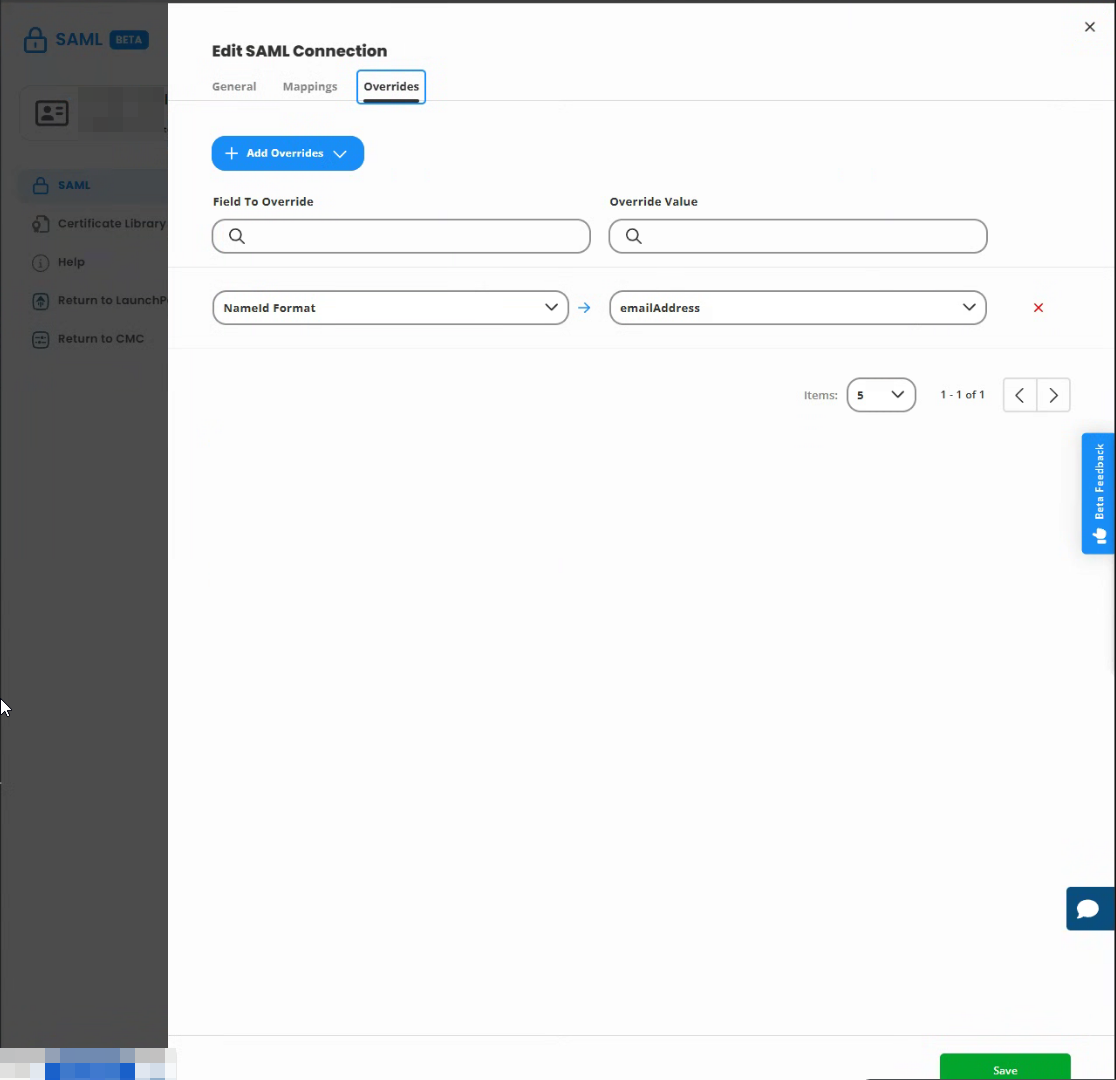
ggLeap identifies users by email address, so the SAML NameID must resolve to the user's email:
- Scroll to the Metadata Overrides section
- In the Select Fields to Override dropdown, choose NameId Format → confirm it is set to
emailAddress - In the same dropdown, choose NameId Value → select Email
- Click Add to save the Service Provider
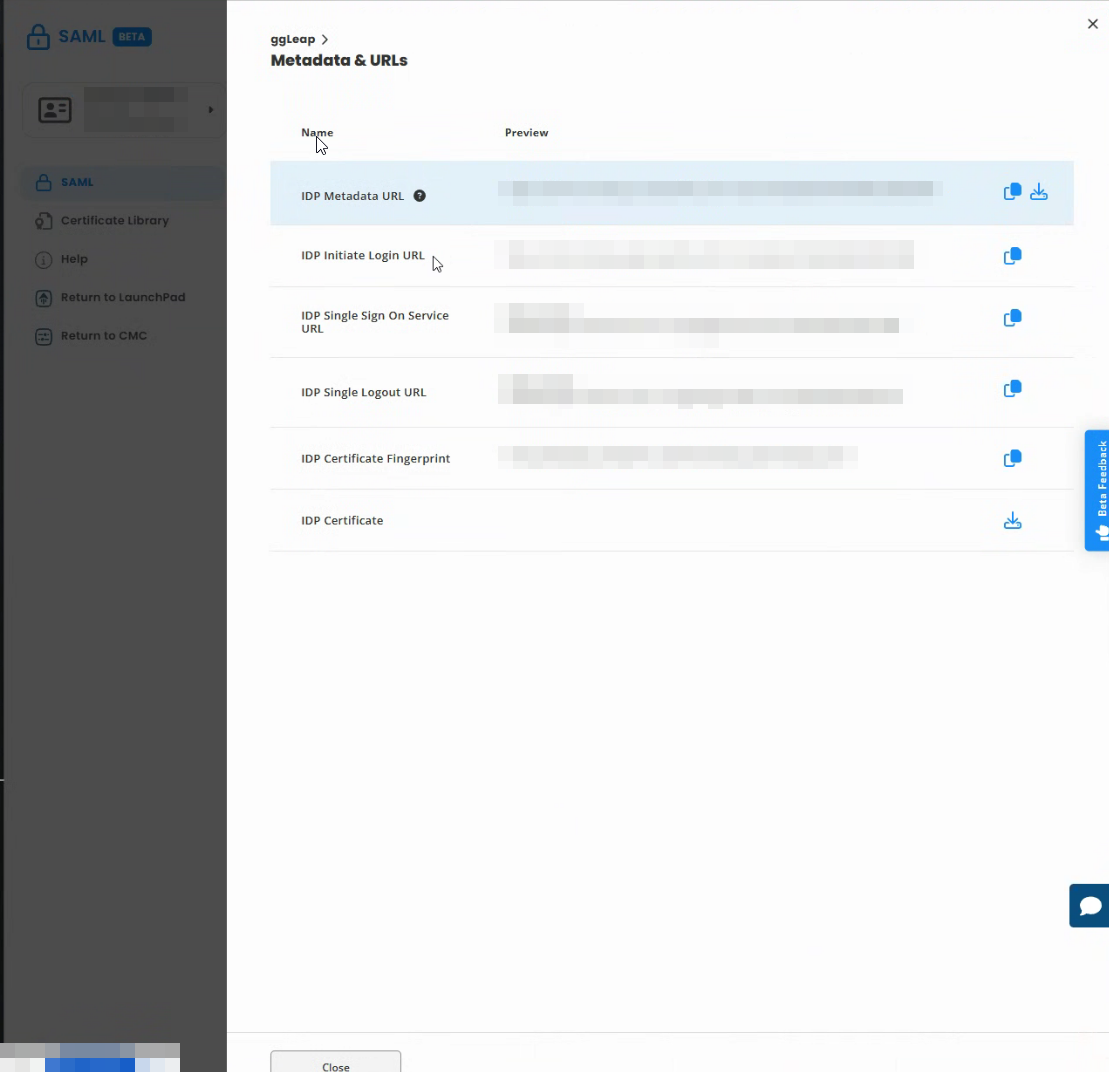
5. Copy the IdP Metadata URL and Login URL
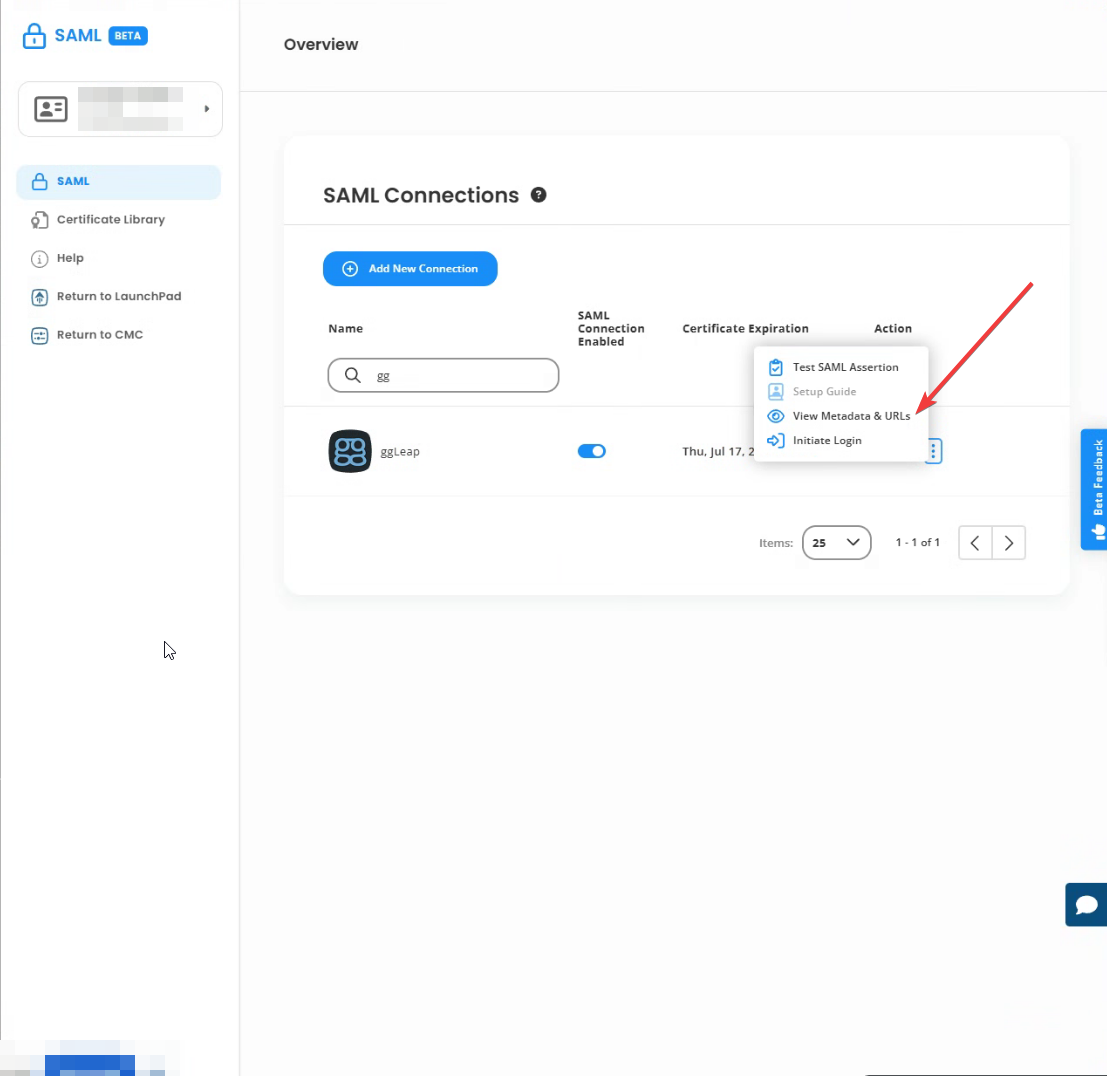
Back on the SAML Console list, locate your new ggLeap connector:
- Copy the IDP Metadata URL (clipboard icon) — you will paste this into ggLeap Web Admin in Step 7
- Click the dropdown arrow next to it and choose Copy IDP Initiate Login URL — you will use this for the LaunchPad tile in Step 6
6. Create the LaunchPad App Tile
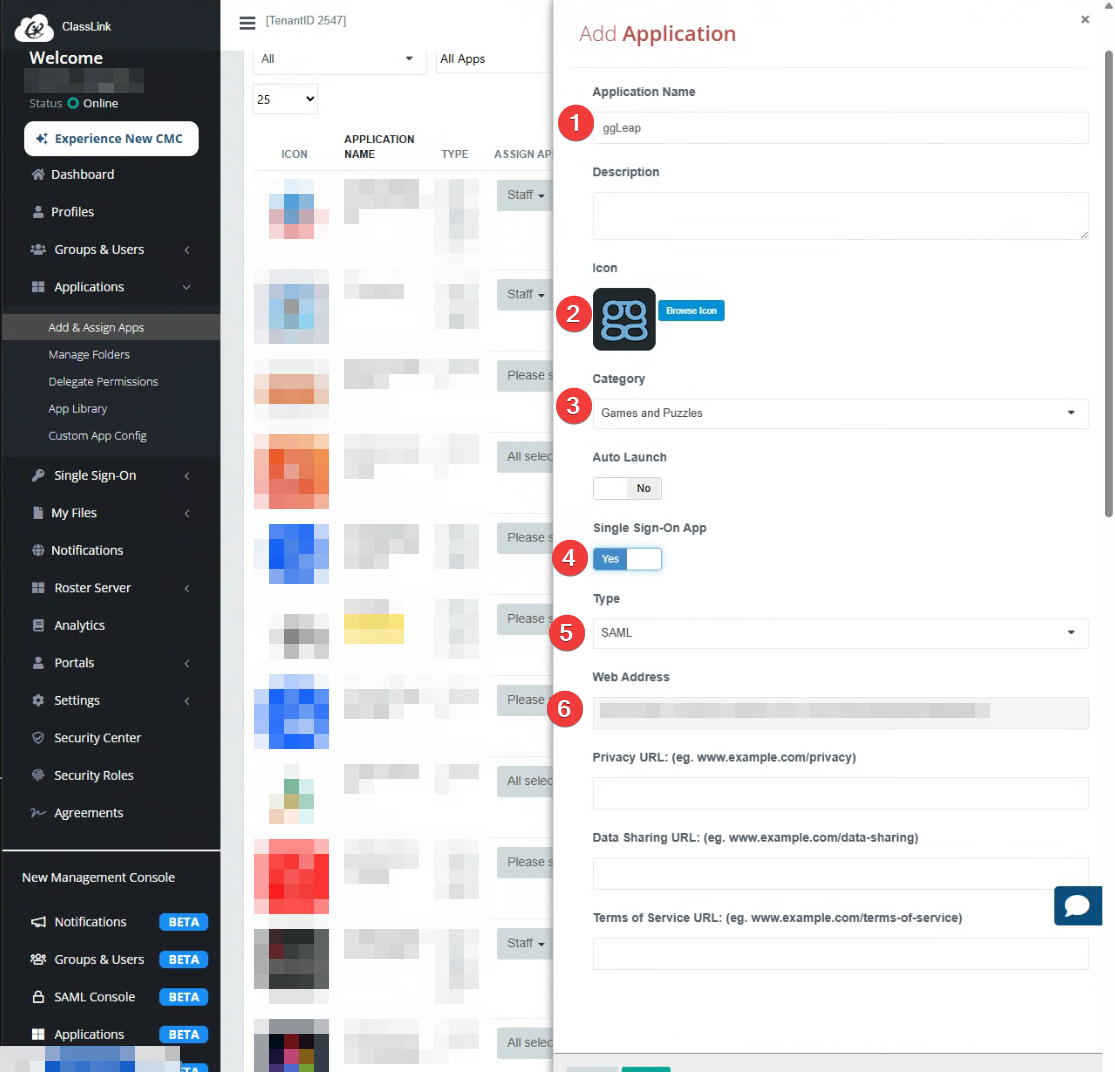
- Navigate to:
ClassLink Management Console > Applications > Add & Assign Apps > Add - Application Name:
ggLeap(this is what users will see) - Icon: upload or request a custom icon
- Single Sign-On App: switch to Yes
- Type: select SAML
- Web Address: paste the IDP Initiate Login URL copied in Step 5
- Click Save, then use Assign to publish the tile to the users, groups, or roles who need ggLeap access
7. Configure ggLeap Web Admin
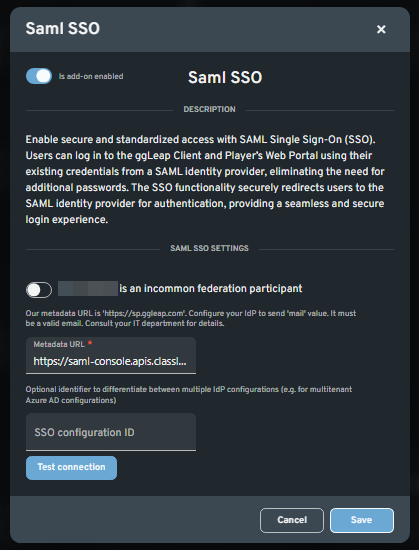
- Ensure your default environment is set to Production
- Go to the ggLeap Web Admin > User Login Setup page
- Enable Single Sign-On (SSO)
- Paste the ClassLink IDP Metadata URL from Step 5
- Click Save
8. Test the Connection
- Sign in to ClassLink LaunchPad as a test user who has been assigned the ggLeap tile
- Click the ggLeap tile and verify you land in ggLeap signed in
- Confirm the account was auto-created in ggLeap Web Admin with the correct first name, last name, and email
📝 Notes:
- The user's email must not already exist in another ggLeap center
- School districts and universities should use email addresses with their institution's domain
- A user account will be automatically created in ggLeap Web Admin upon first sign-in
- If sign-in fails, re-check Step 3 (attribute names are case-sensitive) and Step 4 (NameID must be the user's email) first — these cause the vast majority of failed setups