

 English
 中文
 العربية
🧱 Creating a RAID 10 Game Array in ggRock (First-Time Setup)
Este artículo aún no está disponible en español. Se muestra en inglés.
ggRock builds RAID 10 from mirrored stripes, so you won't find "RAID 10" in the list of stripe types when you first set up the array. This guide shows how to build it from scratch on a new server, using four drives as the example.
📌 How RAID 10 Looks in ggRock
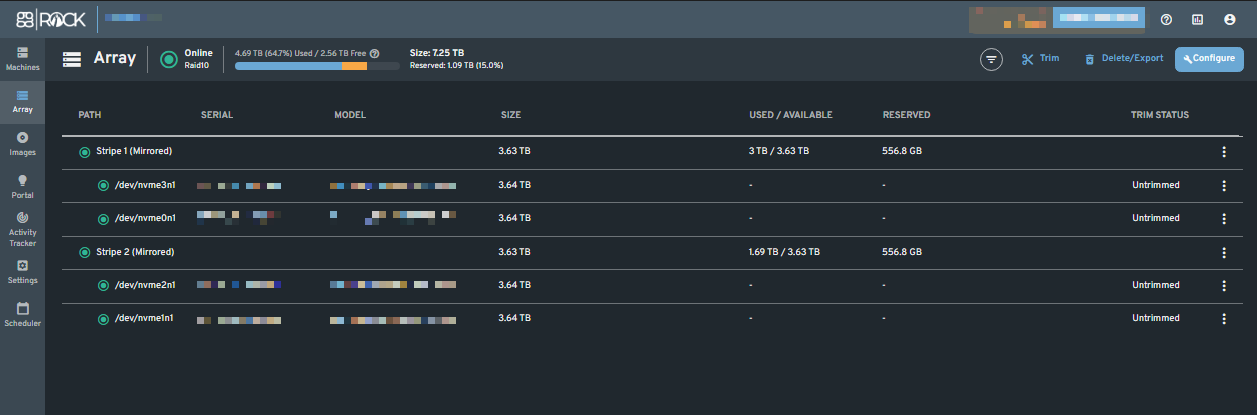
In the Array tab, a RAID 10 array is shown as stripes, and each stripe is labeled Mirrored.
With four drives you get two stripes with two drives each:
- Stripe 1 (Mirrored): drive 1 and drive 2
- Stripe 2 (Mirrored): drive 3 and drive 4
Your usable space is the size of two drives. For example, four 4 TB drives give about 7.25 TB.
✅ Step 1: Before You Start
- You need at least 4 drives for the game array. The two drives in each stripe must be the same size.
- Keep your operating system on separate drives, for example a pair of drives in RAID 1, as in the installation guide.
- During the Debian install, leave the game drives blank. Don't build the game array in the Debian installer or with any other tool. ggRock only recognizes arrays created in the Array tab of its web interface.
- If your game drives were used before, for example in a TrueNAS, ZFS, RAID or Windows setup, ggRock may not list them in the Array tab. See Drives Not Showing Up in the Selection List? below.
🔍 Drives Not Showing Up in the Selection List?
Drives that were used before can carry leftover signatures from the old system, and they may not appear in the Array tab until they're wiped.
⚠️ This permanently erases the drive. Only do this to game drives you're sure have no data you need. Never wipe the drives that hold the operating system.
1. Open a terminal. Use the Debian Control Panel terminal, SSH, or the server console as root.
2. Identify your drives. List them and pick out the game drives by size, model and serial number:
lsblk -o NAME,SIZE,MODEL,SERIAL,MOUNTPOINT
NVMe drives are named nvme0n1, nvme1n1 and so on. SATA drives are named sda, sdb and so on. Your OS drives are on this list too, so check each name carefully before the next step.
3. Clear the old signatures. Run this once for each game drive. Replace nvme0n1 with the correct drive name and double check it before pressing Enter:
wipefs -a /dev/nvme0n1
4. Refresh. Reload the Array tab. The drives should now appear in the selection box.
🔧 Step 2: Create the Two Stripes
-
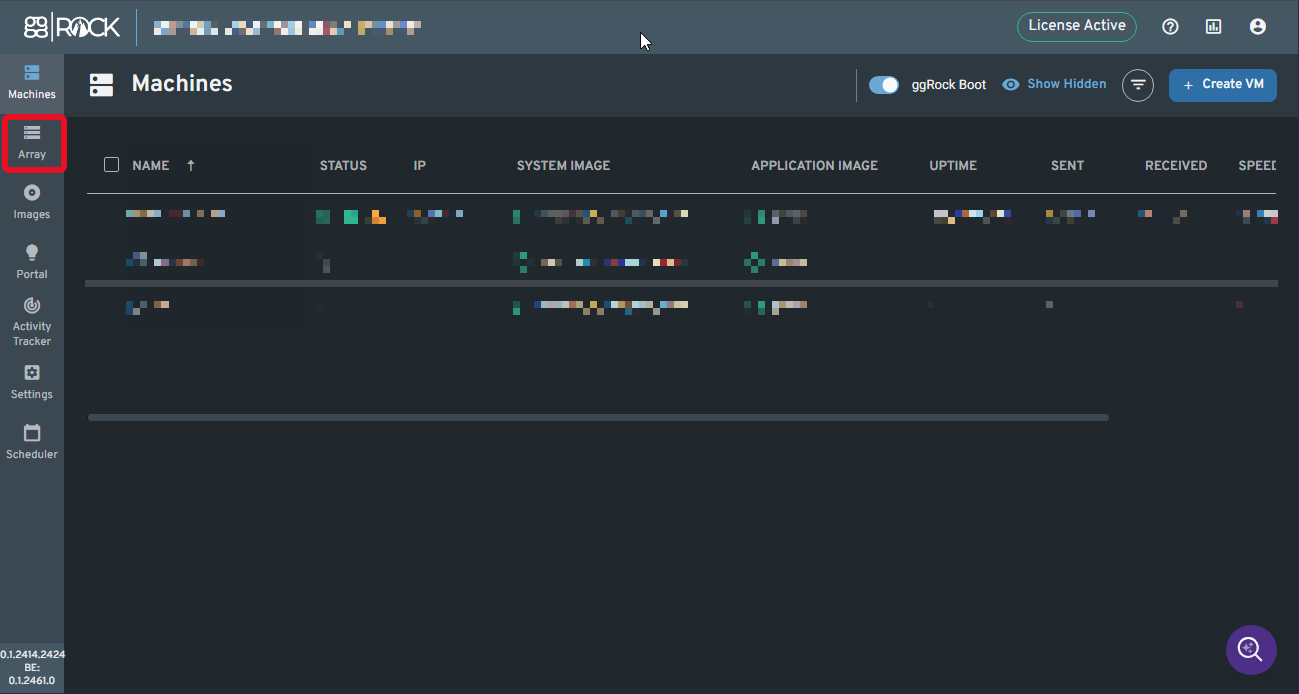
Open the ggRock admin panel and go to the Array tab.
-
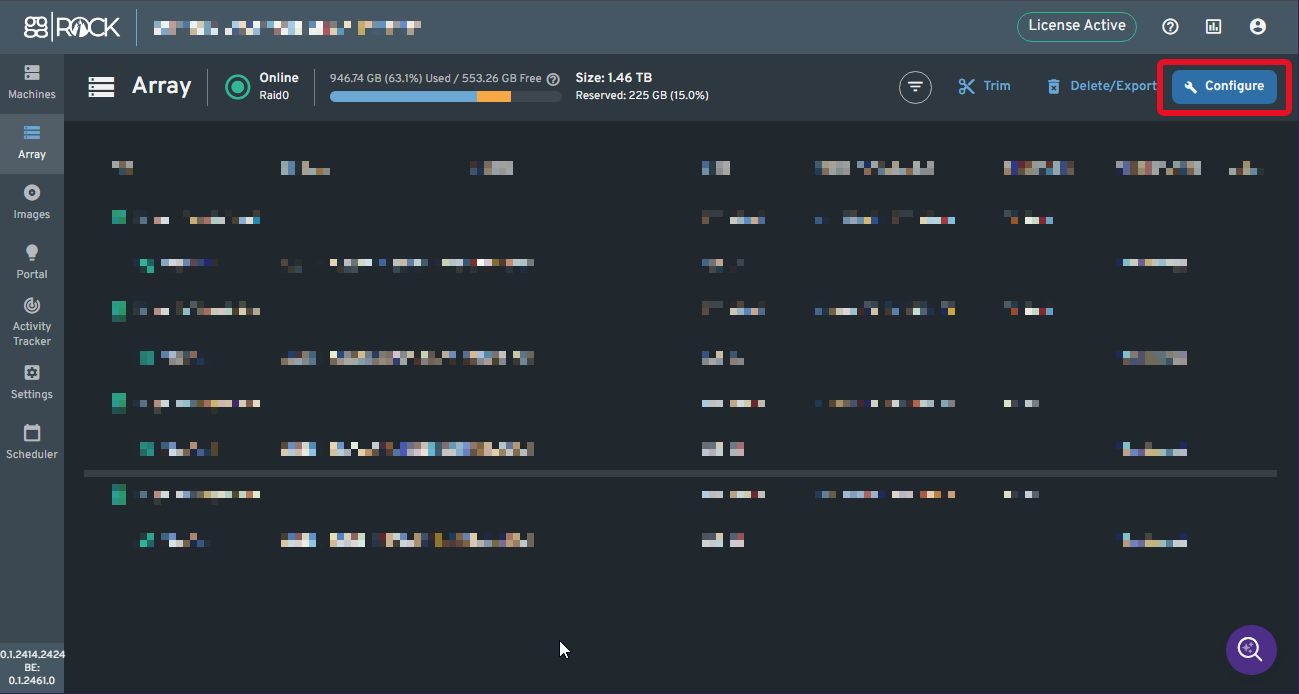
Click the Configure button at the top-right.
-
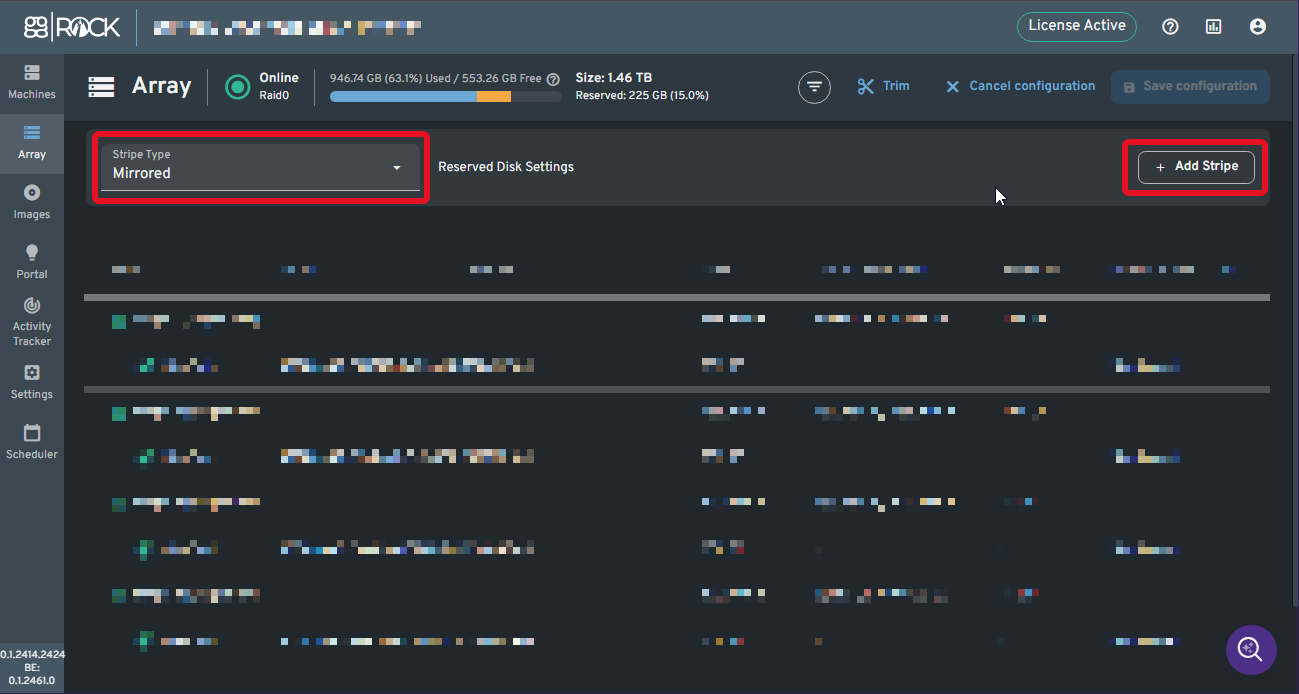
Select Mirrored from the Stripe Type drop-down, then click the Add Stripe button twice.
🪞 Step 3: Add Drives to Each Stripe
Add two drives to each stripe. The two drives in each stripe must be the same size.
🧪 Step 4: Check the Result
In the Array tab, confirm that:
- The array shows Online and Raid10 in the header.
- Both stripes are labeled (Mirrored) and each contains two drives.
- The total size is about half the combined size of all four drives.
🧹 Created the Stripes With the Wrong Type?
If you added all four drives as separate stripes, you can't convert them to RAID 10 in place, because data is already spread across all four drives. On a new install with no data, delete the array and recreate it:
- In the Array tab, choose Delete/Export and delete the array.
- Start again from Step 2.
If the array already has games or images on it, back up your data first. Deleting the array erases everything on it.
❓ Why Isn't RAID 10 in the Drop-Down?
There is no RAID 10 option. Choose Mirrored as the Stripe Type, as in Step 2, and ggRock builds RAID 10.
🆘 Still Stuck?
Chat with our support team with the purple chat bubble at the bottom-right of ggcircuit.com and include:
- A screenshot of the Array tab
- The number and size of your game drives
- The output of
lsblk -o NAME,SIZE,MODEL,SERIAL - Your ggRock version