

 Español
 中文
 العربية
🧑💼 SAML SSO - How to Set Up Microsoft Entra ID (Azure AD)
- Download the SAML Metadata File
- Go to https://sp.ggleap.com/
- Right-click the link on the page and choose “Save link as…”
- Save the file as an XML file to your local machine
- Log In to Azure
- Go to the Azure Portal
- Log in with your Azure administrator account
- Set Up SAML in Azure
- Navigate to your application in Azure AD

-
Go to Single Sign-On > Choose SAML
-
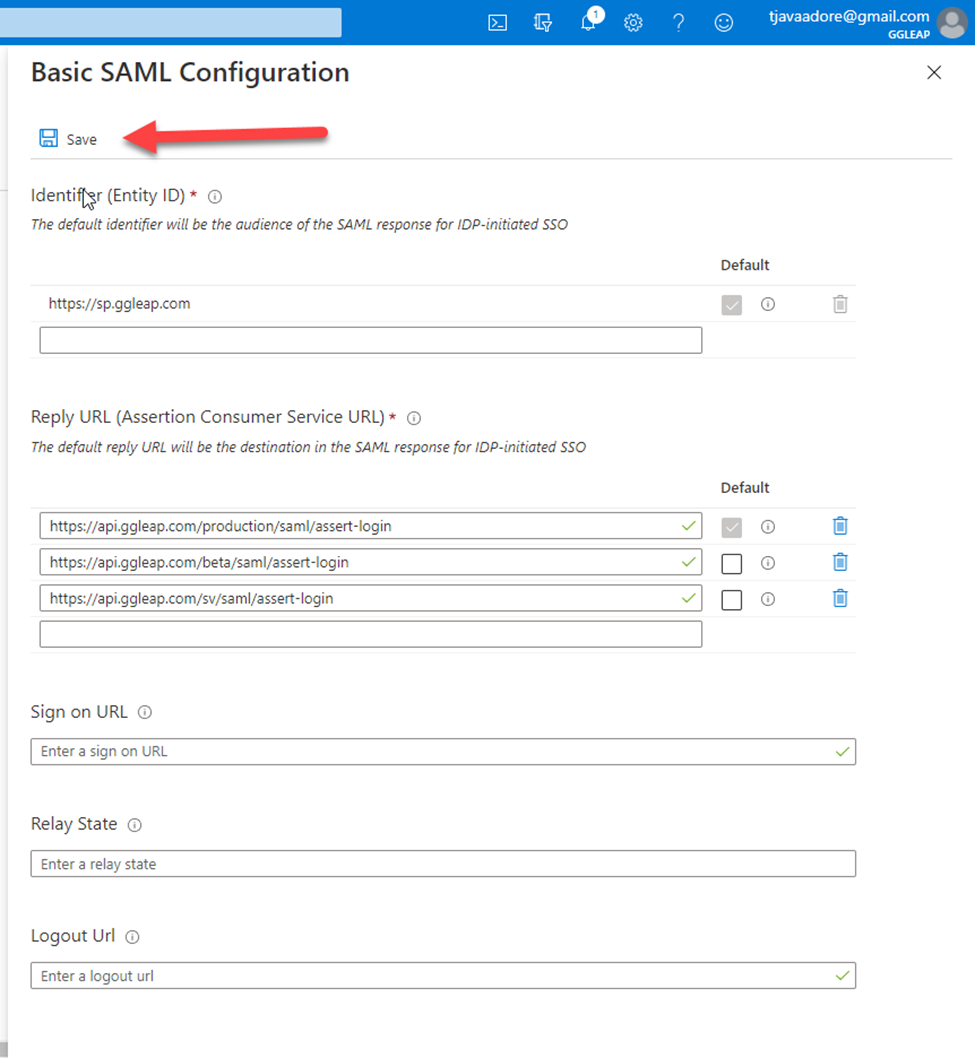
Upload the downloaded XML metadata file
-
Click Save
- Configure ggLeap Web Admin
-
Copy the App Federation Metadata URL from Azure
-
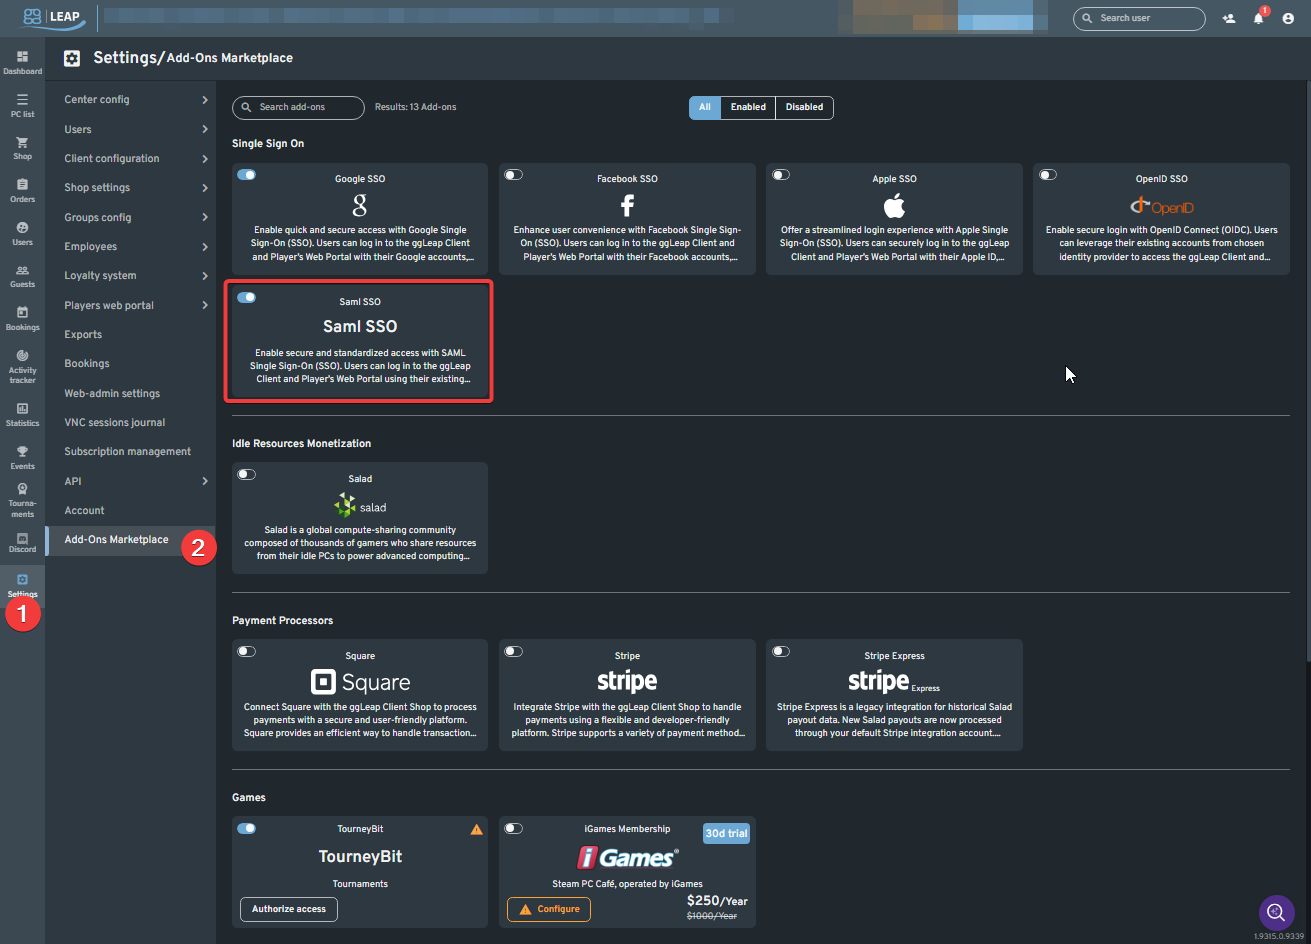
Go to the ggLeap Web Admin > Add-Ons Marketplace > Saml SSO Add-on page
-
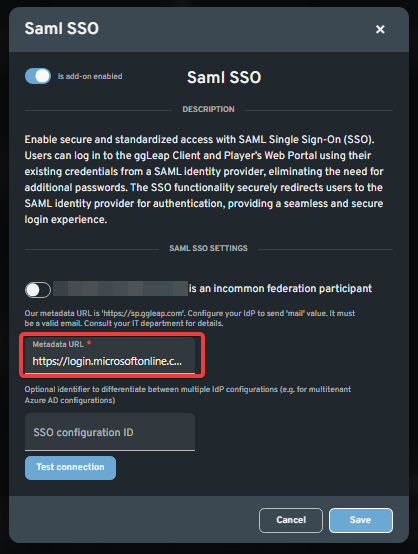
Enable the Single Sign-On (SSO) Add-on.
-
Enable <YOUR INSTITUTION NAME> is an incommon federation participant if your institution is a part of incommon.
-
Paste the App Federation Metadata URL into the "Metadata URL" text field.
-
Enter the SSO configuration ID if your institution's IdP hosts more than one SSO configuration and requires this parameter.
-
Click Save
📝 Notes:
- The user’s email must not already exist in another ggLeap center
- Universities should use email addresses with their institution’s domain
- A user account will be automatically created in ggLeap Web Admin upon first sign-in
- For info on free time assigned to accounts, click here (← replace with actual link)