

 Español
 中文
 العربية
PC/Console Groups
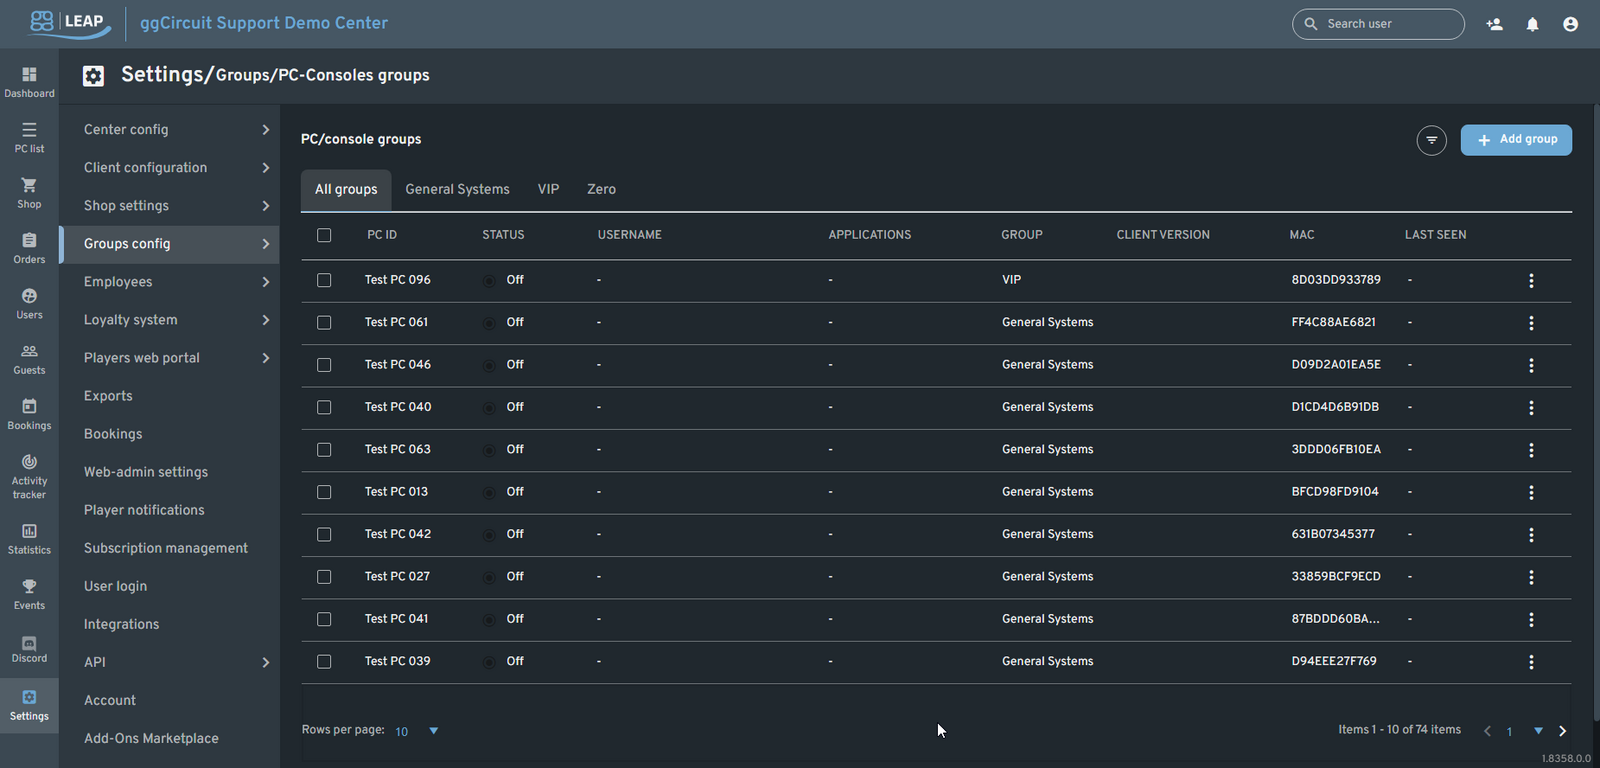
PC / Console Groups
Location: Settings ▶ Groups config ▶ PC/Console groups
Organize your machines into named groups (VIP, General, Zero, etc.) to apply discounts.
Add a New Group
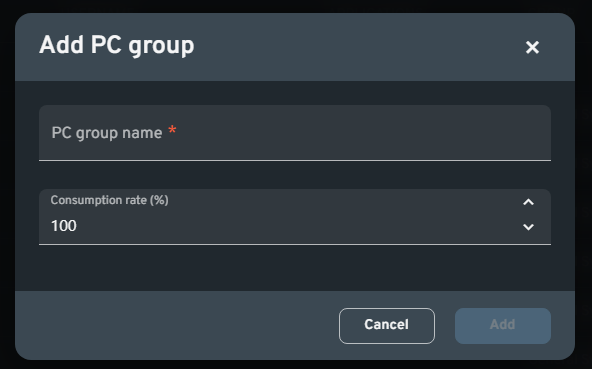
- + Add group
Click to open the Add PC group dialog. - PC group name
Enter a descriptive name (e.g. “VIP,” “Testing Lab”). - Consumption rate (%)
Set a billing multiplier for time-based charging (default 100%). - Add
Creates the group; it immediately appears as a new tab.
Filtering & Search
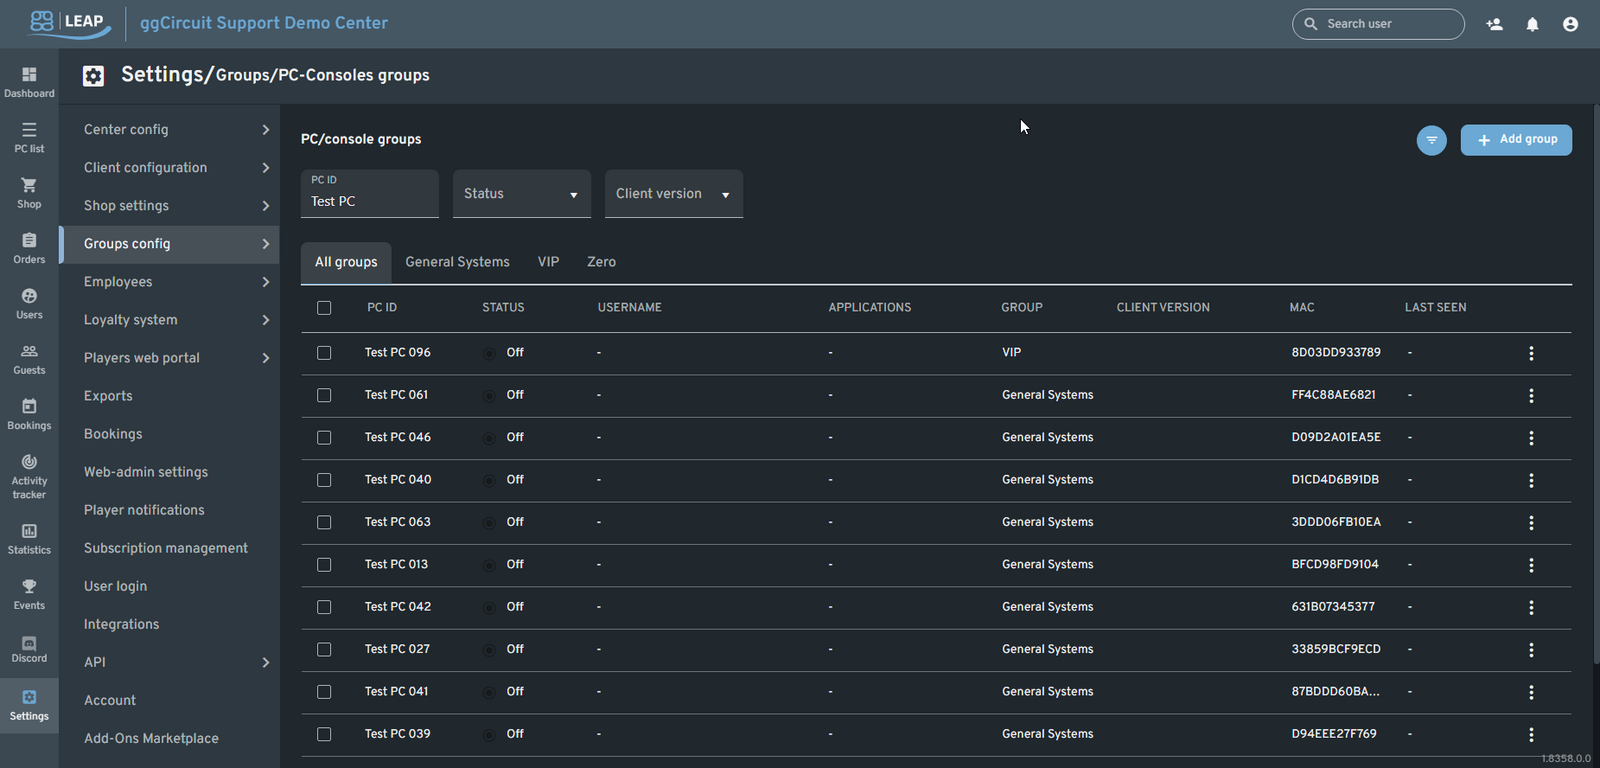
Use the filter bar at the top to narrow the list by:
- PC ID (partial match)
- Status (On / Off)
- Client version (exact or prefix)
Combine filters to quickly locate specific machines across all groups.
Assigning Individual PCs
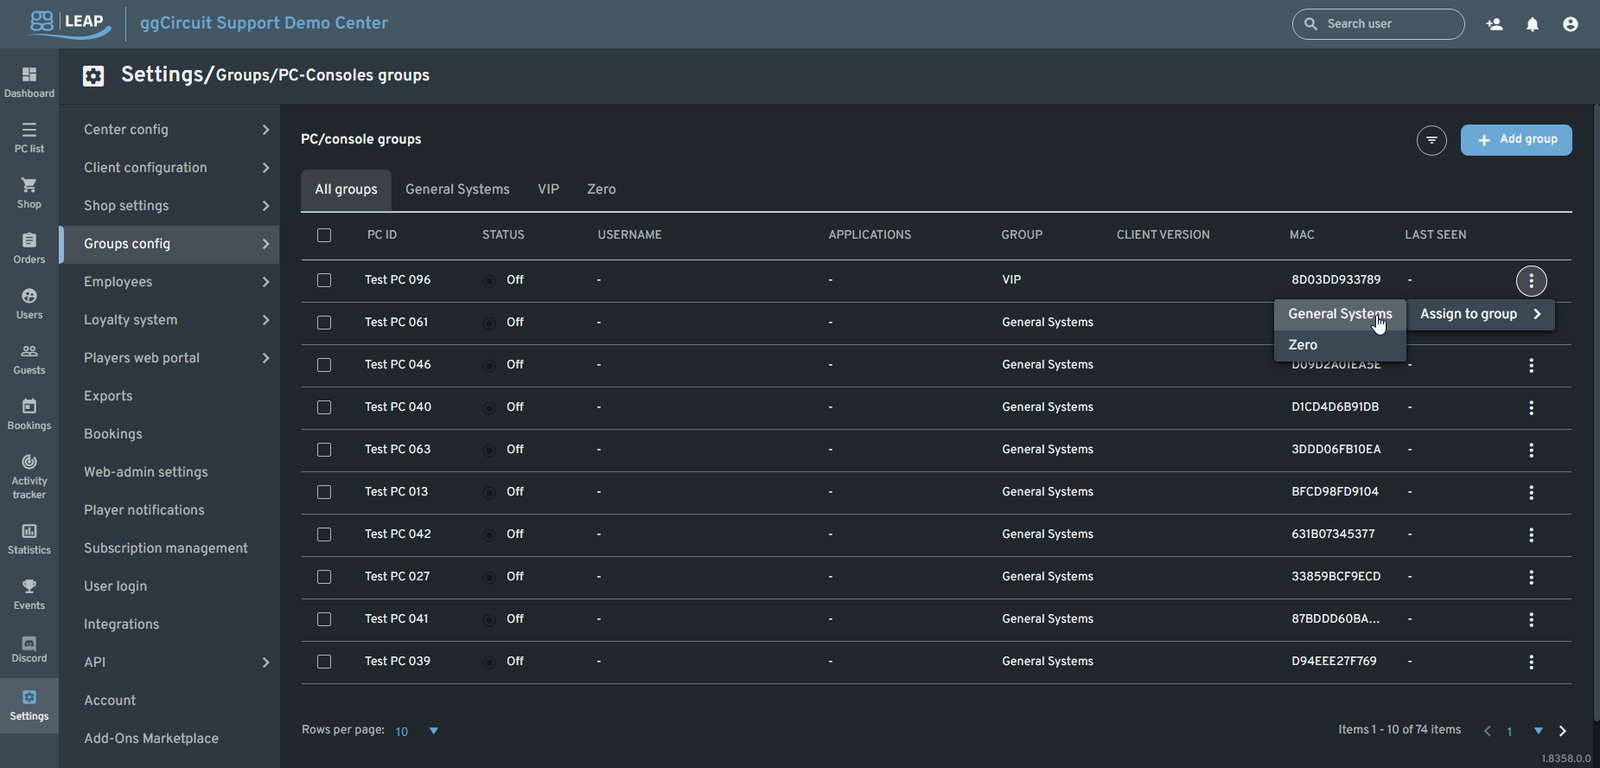
Each row’s ⋮ menu lets you:
- Assign to group ▶ choose a target group from the submenu.
- Rename PC, View details, or Remove (if available).
Bulk Moving PCs
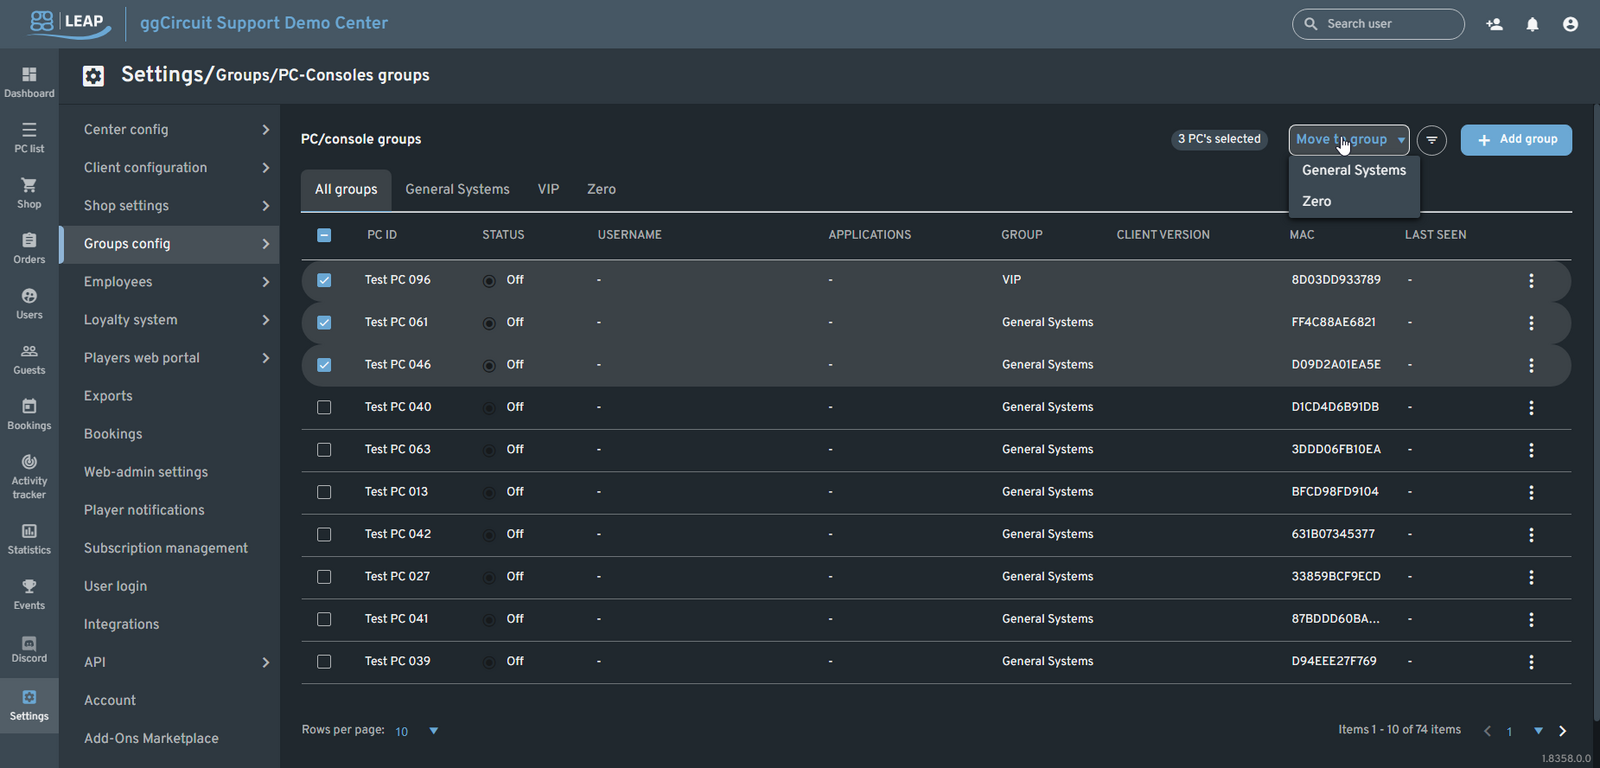
- Select one or more checkboxes at the left of each PC row.
- Click the Move to group dropdown that appears above the table.
- Choose a target group to reassign all selected PCs in one step.