

 Español
 中文
 العربية
II. - 💾 Create a Bootable Debian Installer
Step 3: Create a Bootable Debian USB with Rufus
Now that you've launched Rufus and selected the Debian ISO, here’s what to do next:
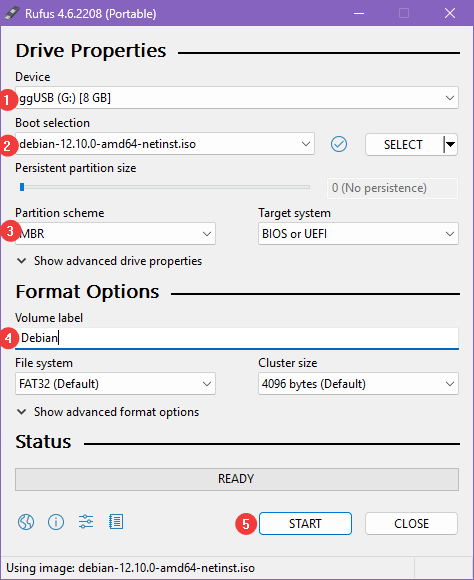
🧭 1. Device
- Make sure the correct USB drive is selected under Device (e.g.,
ggUSB (G:)). - ⚠️ Warning: All data on this USB drive will be erased.
📦 2. Boot Selection
- The Debian ISO should already be loaded (e.g.,
debian-12.10.0-amd64-netinst.iso). - If not, click Select and browse to the ISO you downloaded earlier.
⚙️ 3. Partition Scheme & Target System
- Partition scheme:
MBR - Target system:
BIOS or UEFI
✅ This setup works on most systems. If you're only targeting newer UEFI systems, you can also choose
GPT+UEFI (non-CSM).
💾 4. Format Options
- Volume label: Change it to something like
Debian(optional but helpful). - File system:
FAT32 (Default) - Cluster size:
4096 bytes (Default)
No need to touch the "Advanced format options" unless you know what you're doing.
🔥 5. Start the Process
- Click the START button.
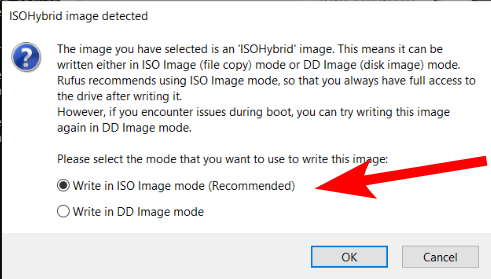
🧪 6. ISOHybrid Mode Prompt
-
Rufus may ask how to write the image:
-
Choose Write in ISO Image mode (Recommended) and click OK.
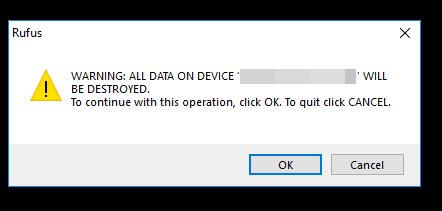
🧼 7. Confirmation Warning
- You’ll see a final warning that all data on the USB drive will be destroyed.
- Confirm and proceed.
⏳ Wait for It...
Rufus will now write the Debian installer to the USB stick. This usually takes a few minutes.
Once it says READY, you're good to go! 🎉
✅ What’s Next?
Now that you've got:
- 📦 The Bootable Debian Installer
You're ready to Install Debian Linux.
Installation path · Step II of VIII