

 Español
 中文
 العربية
VII. - 🖼️ Create, Configure, and Test ggRock Images
🖥️ 1. System Image Creation
There are two methods for creating your System Image:
- ✅ Seamless Boot Process (Recommended)
- 🧰 Legacy Image Creation Tool
📹 Learn more about each method:
- Adding a New Machine Type to a ggRock Image using the ggRock Seamless Boot Procedure
- ggRock Image Creation Tool Manual (Deprecated)
⚡ 2. First-Time PXE Boot
Power on your test machine and PXE boot it. This will automatically trigger the imaging process.
You’ll see the following screens:
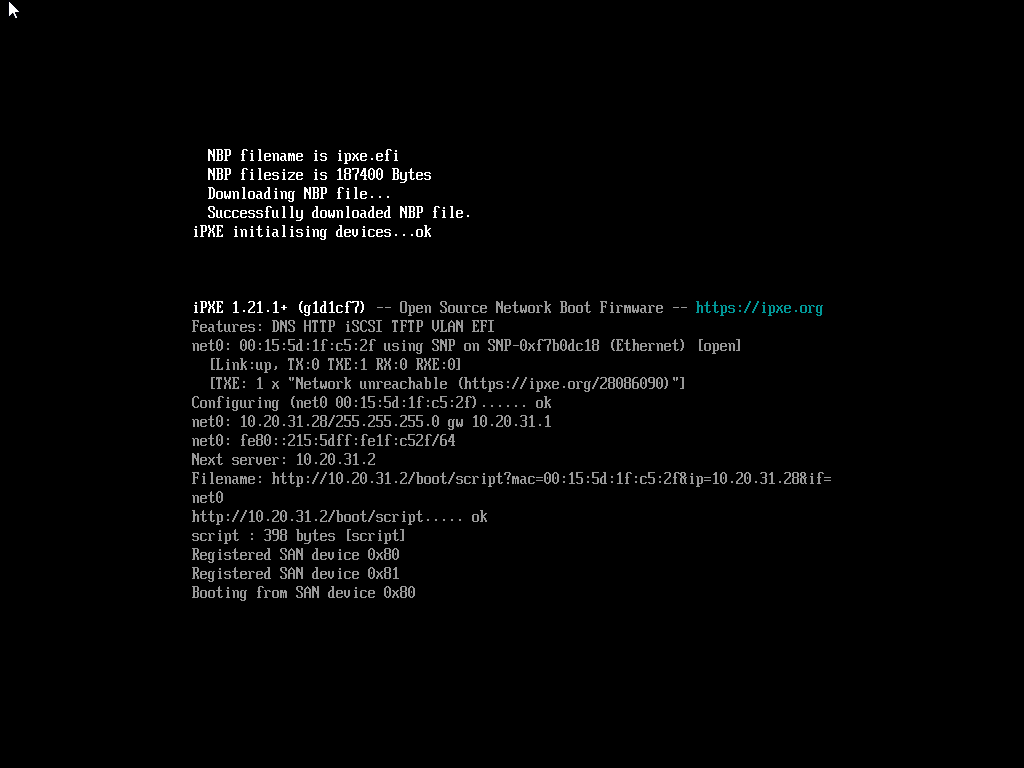
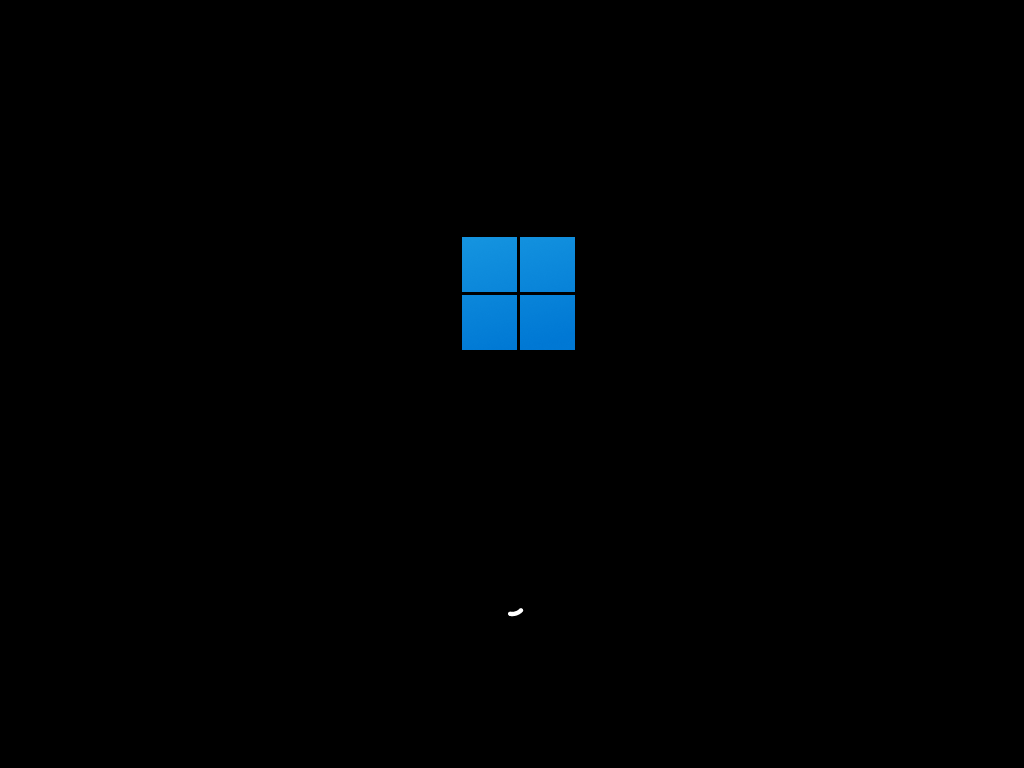
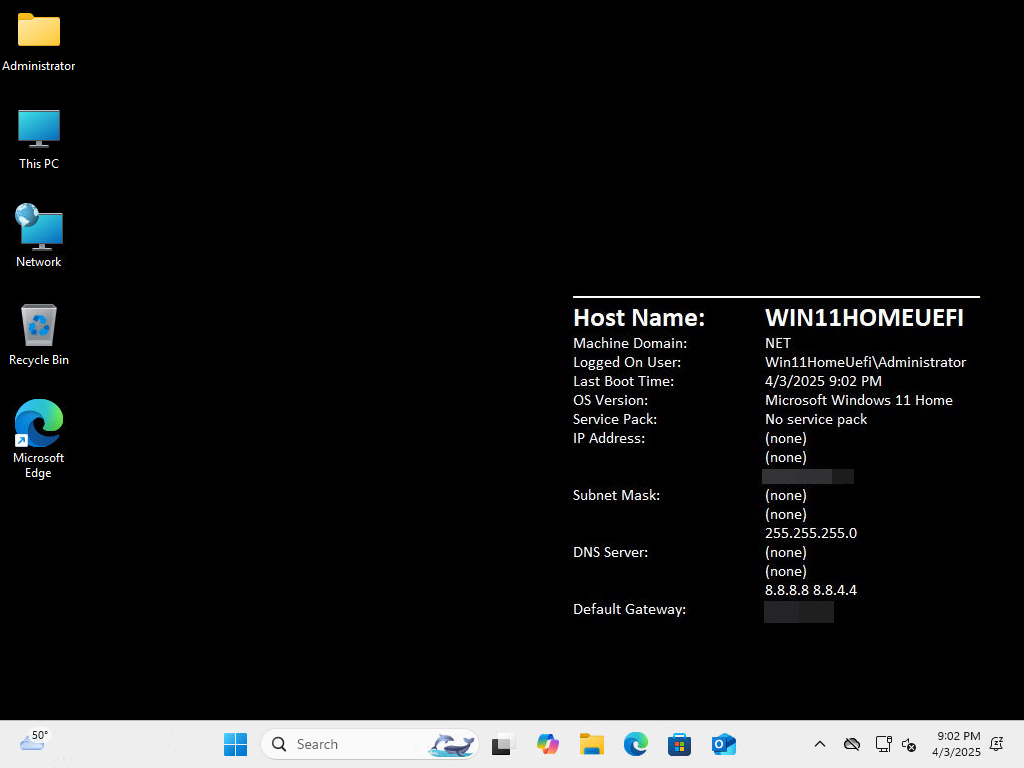
Once booted, the machine will appear in ggRock:
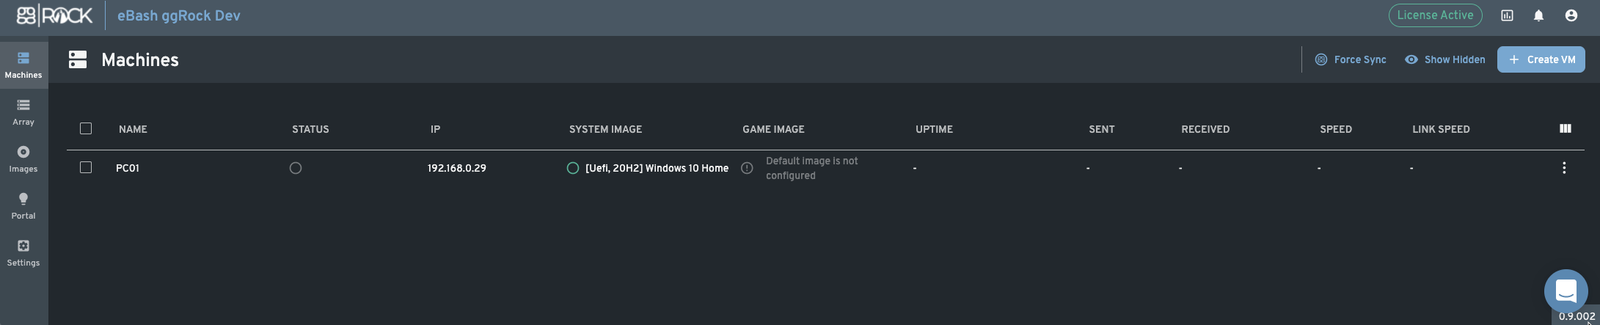
🧠 Tip: You only need to PXE boot one machine at this point to start image testing.
🎮 3. Create the Games Image
💾 Estimate Image Size
Before creating your Games Image, consider:
- 🧠 Writeback cache = 10 GB × number of machines
- 🔒 Reserve at least 15% of array capacity free
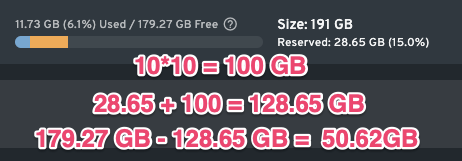
⚠️ Note: You cannot shrink an image after it’s created — you can only grow it. Better to round up!
🧠 Maximum Games Image Size Calculator (New Install)
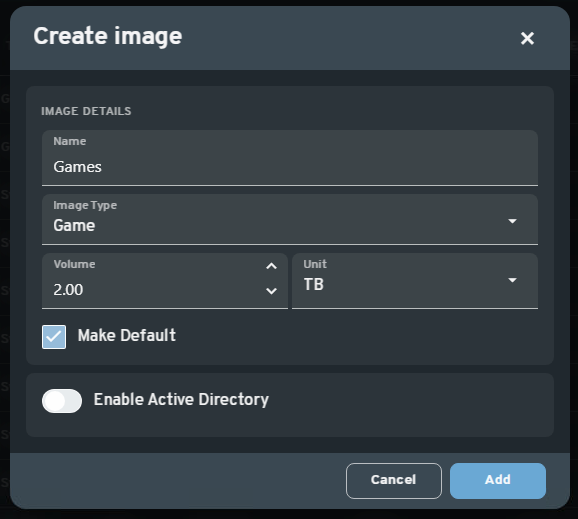
🛠️ Create the Image
- Navigate to the Images tab
- Click Create Image
- Set a name and storage size
- Click Add
🛑 4. Shut Down the Test Machine
Once the system image and game image have been created:
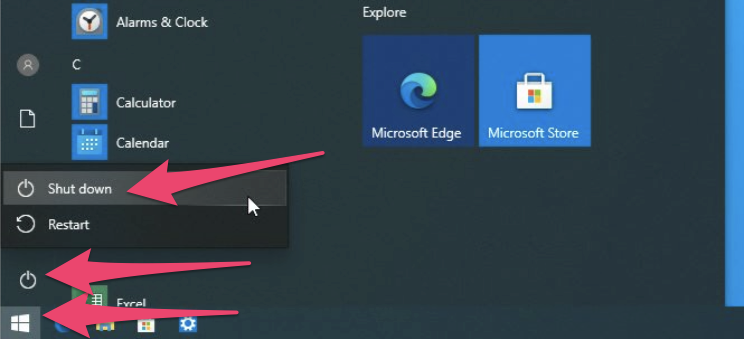
- Shut down your test machine normally (Start → Power → Shut Down)
🖱️ 5. Apply the Games Image
- Back in the ggRock Web UI
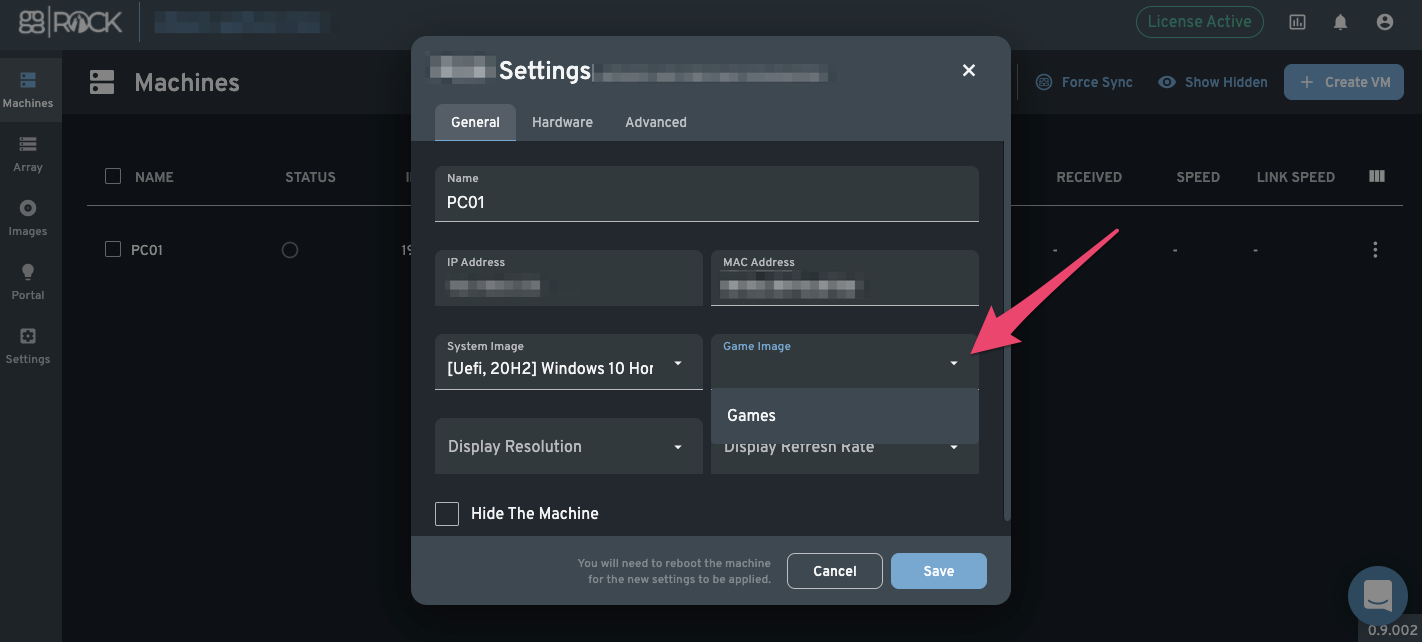
- Click the Settings gear or use the kebab menu to the right under Machines for the machine in question.
- Apply the Games Image you created
🛠️ 6. Initialize the Games Image
With the Games Image created, follow these steps to initialize and prepare it for use:
a. Assign the Games Image to the Test Machine:
- In the ggRock Web UI, navigate to the Machines tab.
- Locate your test machine, click the overflow menu (three vertical dots), and select Settings.
- In the Machine Settings dialog, find the Games dropdown menu.
- Select the newly created Games Image from the list.
- Click Save to apply the changes.
b. Boot the Test Machine:
- Power on the test machine and allow it to PXE boot.
c. Initialize the Games Drive:
-
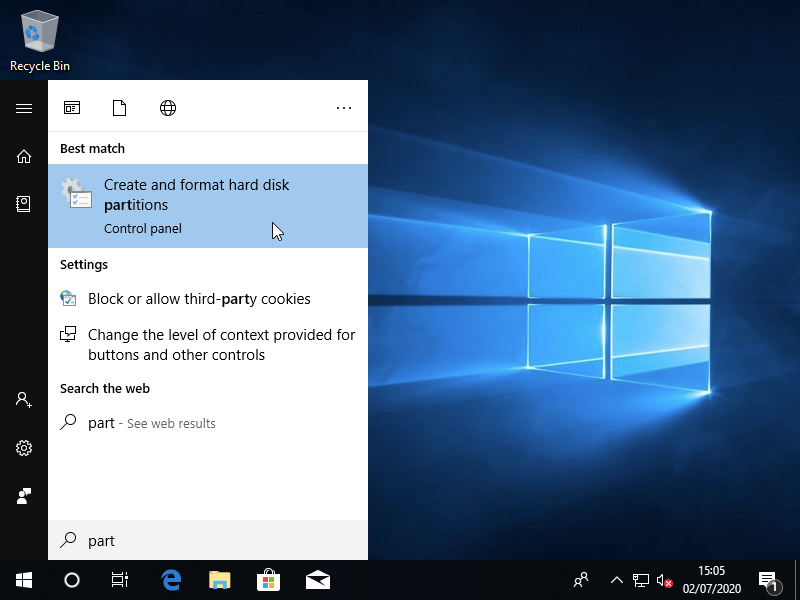
Open Disk Management in Windows.
-
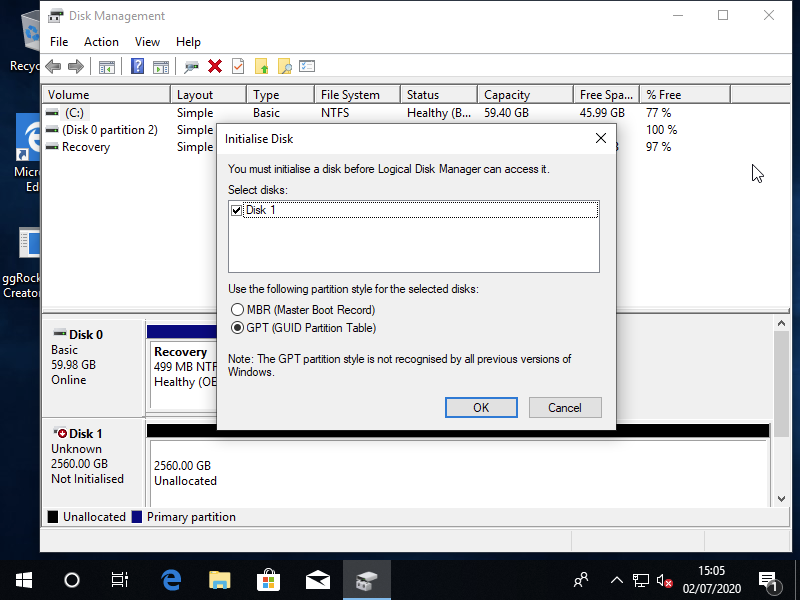
A prompt will appear to initialize the new disk. Choose the appropriate partition style (GPT is recommended for most systems).
-
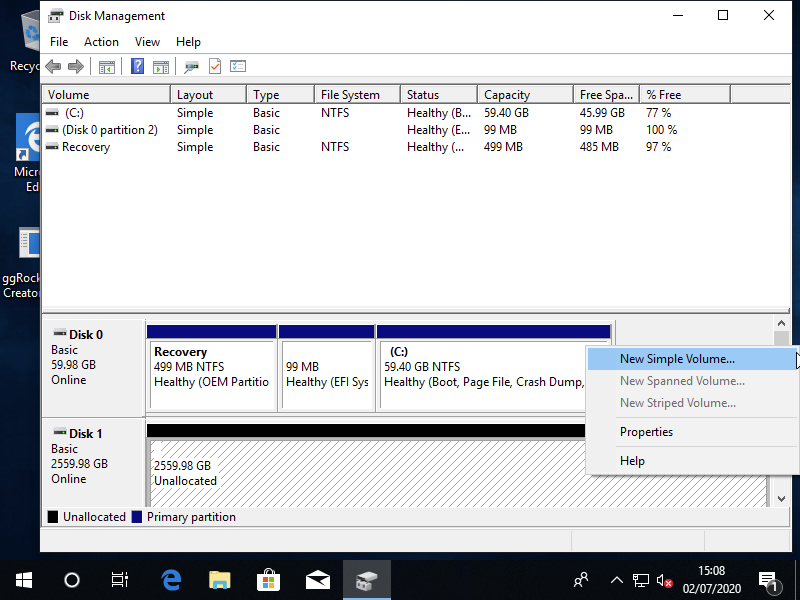
Once initialized, right-click on the unallocated space and select New Simple Volume.
-
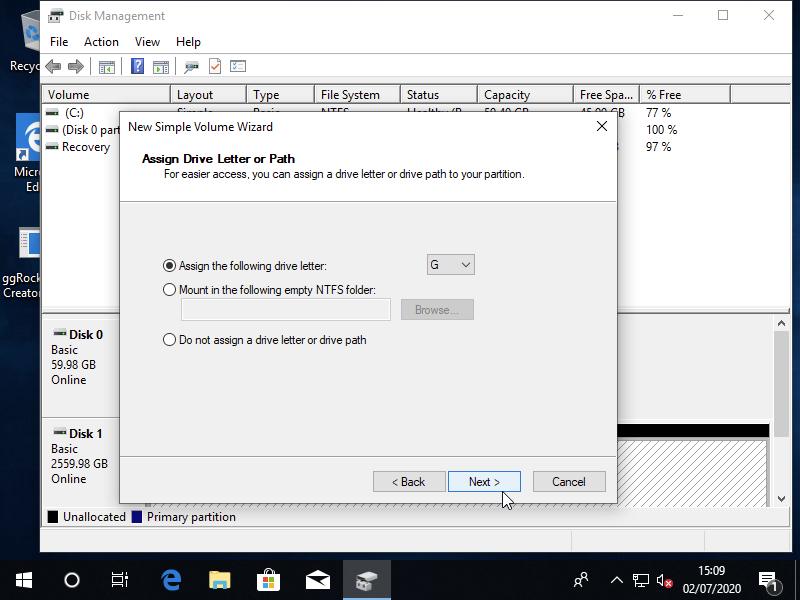
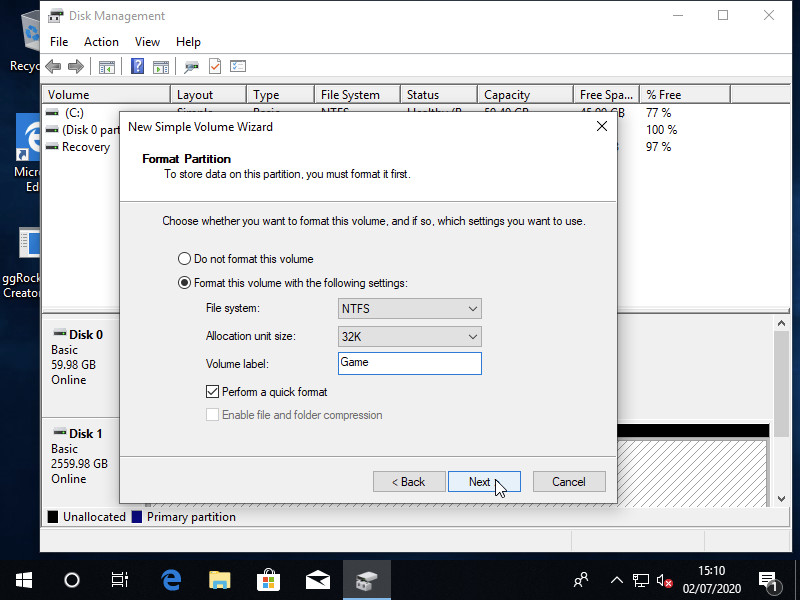
Follow the wizard to format the partition, assigning a drive letter (e.g., G:) and using the NTFS file system.
-
Ensure the Allocation Unit is set to
32K, with no exceptions.
-
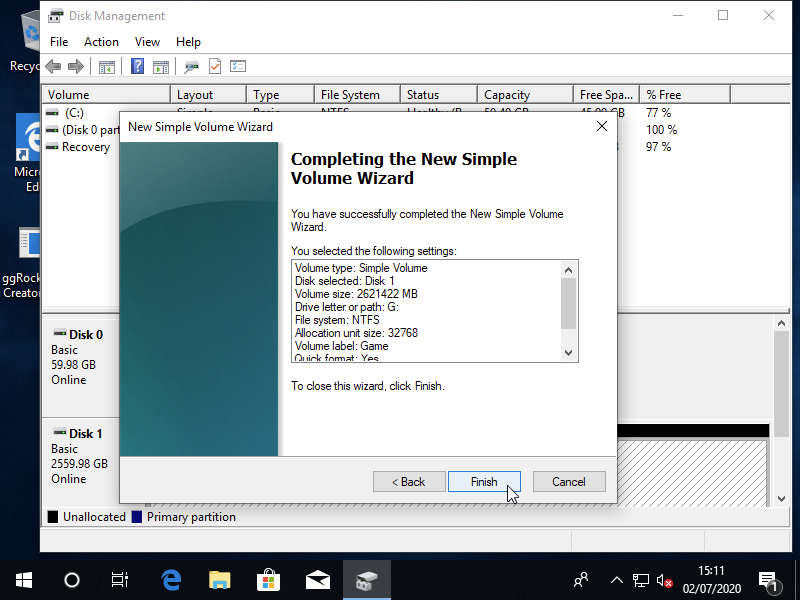
Complete the new simple volume wizard by clicking the “Finish” button.
d. Verify the Games Drive: -
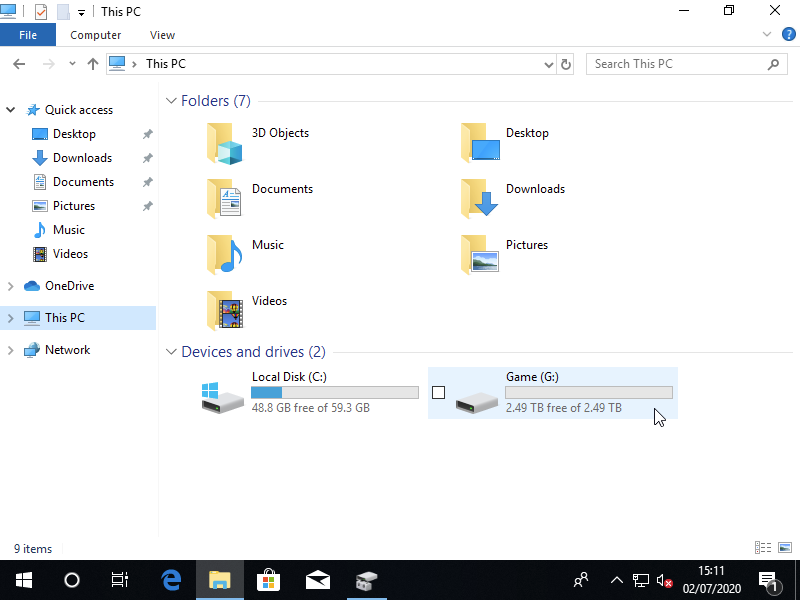
Open File Explorer and confirm that the new drive (e.g., G:) is visible and accessible.
🔄 7. Apply Writebacks for the First Time
To ensure that changes made during the initialization are saved:
In the ggRock Web UI:
- Navigate to the Machines tab.
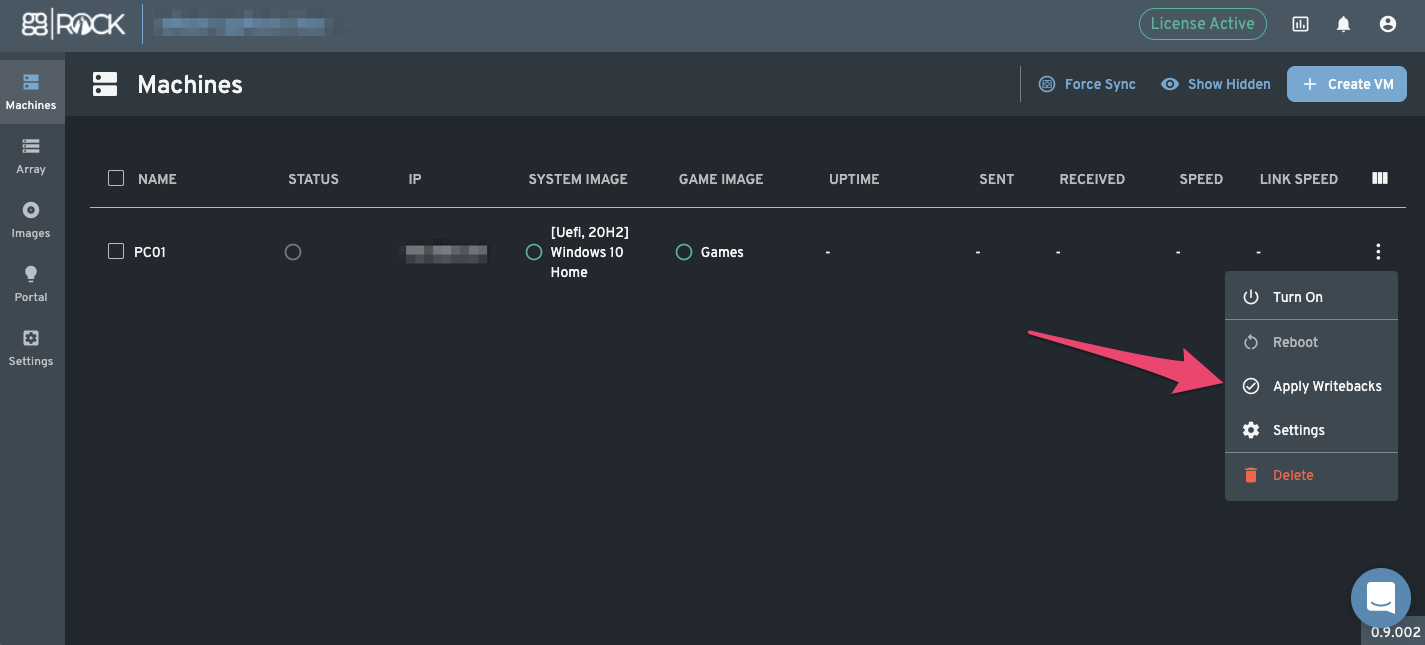
- Locate your test machine, click the overflow menu (three vertical dots).
- Choose Apply Writebacks to commit the changes to the Games Image.
Congratulations! 🎉
You've successfully created, configured, and tested your ggRock System and Games Images. Your test machine is now set up for diskless PXE booting with the configured images.
Next Steps:
- Repeat the process of BIOS configuration and initial bootup for additional client machines as needed.
- Install Chipset, Sound, Video, and any other necessary drivers.
- Install the ggLeap Client
- Regularly update and maintain your images to ensure optimal performance and security.
If you have further questions or need assistance, feel free to reach out. Happy gaming! 🎮
Installation path · Step VII of VIII