

 Español
 中文
 العربية
Enable / Disable Windows Auto-Login
This article describes necessary steps to enable or disable the automatic login process for a user account in Windows.
How to disable Windows auto-login
- Press Windows Key+R
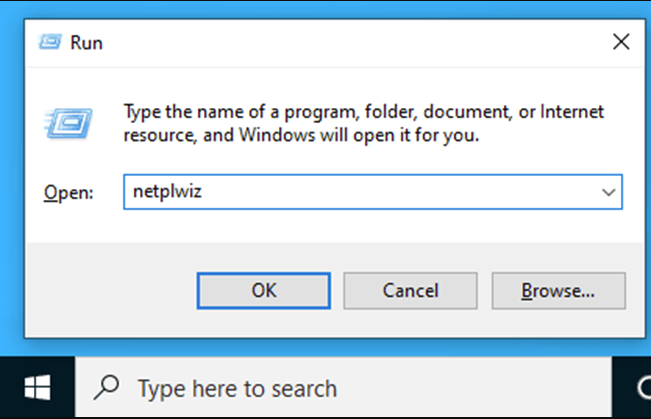
- Type “netplwiz“, then press Enter.
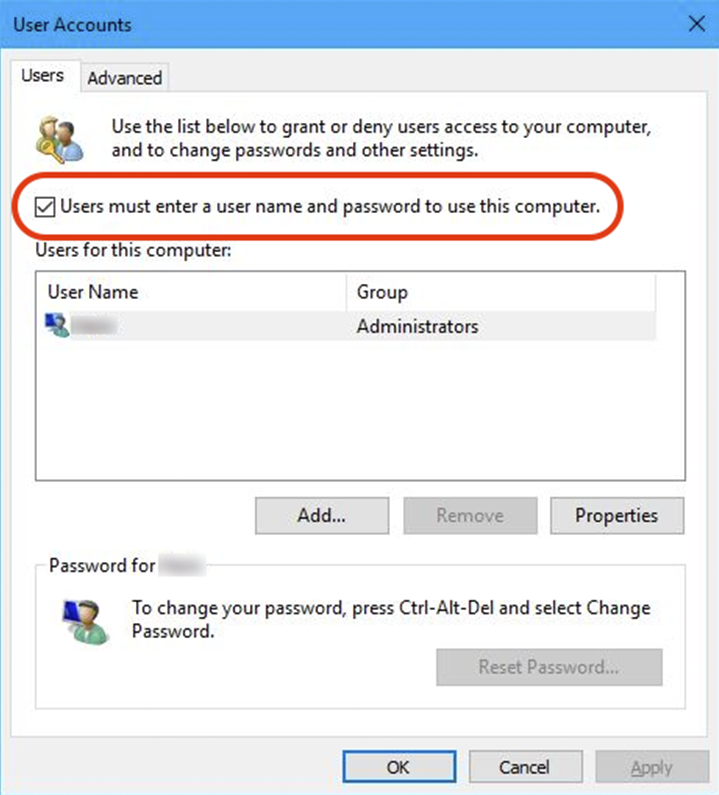
- In the “User Accounts” window, place a check next to (or, to disable, remove a check from) the “Users must enter a username and password to use this computer” checkbox, then click the "OK" button.
2**. Restart** the system computer and the system will prompt you to enter your password at the login screen (or not, if you enabled it)
Note:
In order to disable auto-login, the following must be true:
- Settings → Sign-in options → “Use my sign-in info to automatically finish setting up my device after an update or restart” has to be disabled.
- Windows Account has to have a password.