

 Español
 中文
 العربية
Automated Secure Boot Enrollment with ggRock
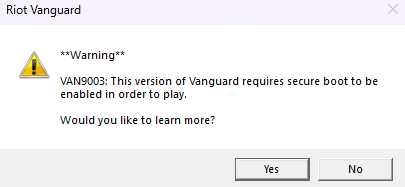
🛑 Why Enable Secure Boot?
Some PC games and applications now require Secure Boot to be enabled to ensure system integrity and prevent tampering. This means both Secure Boot and its associated keys must be properly configured.
✅ Step-by-Step Guide
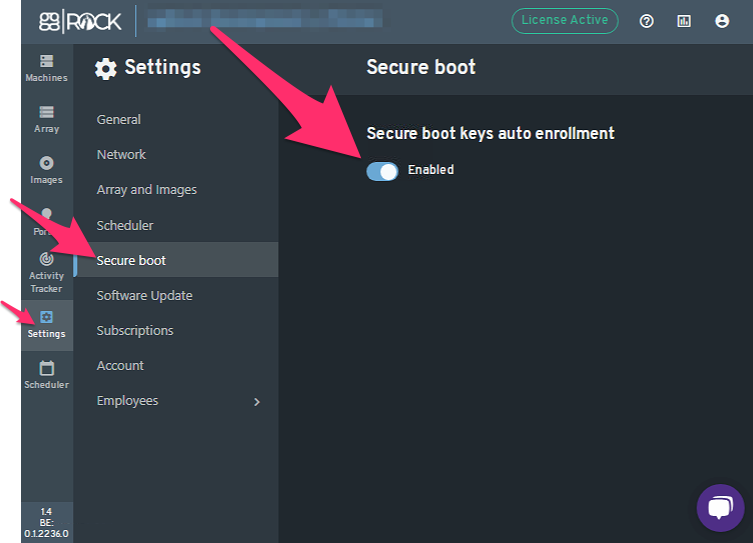
1. Enable Auto-Enrollment in ggRock
- Navigate to
Settings > Secure Bootin the ggRock web UI. - Enable Secure Boot Keys Auto-Enrollment.
📸 Example:
2. Enter the BIOS Setup
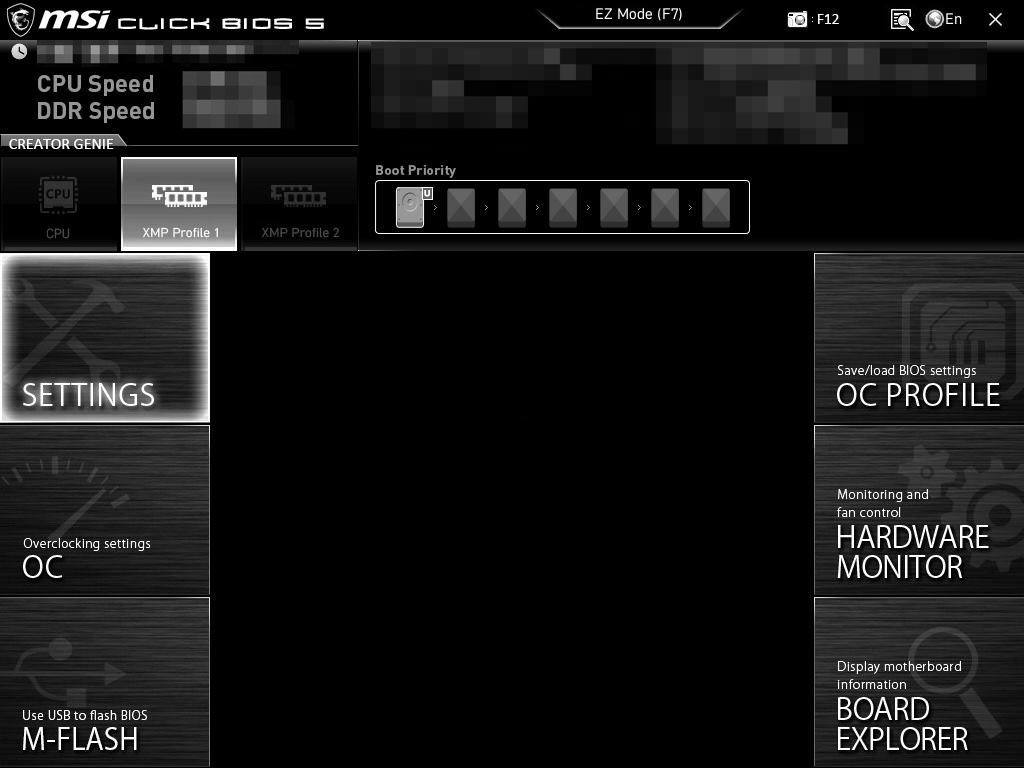
Access the BIOS/UEFI setup menu on the client machine:
- Common keys:
F2,F8,F10,F12,ESC, orDEL(varies by manufacturer).
📸 Example:
3. Configure Secure Boot in BIOS
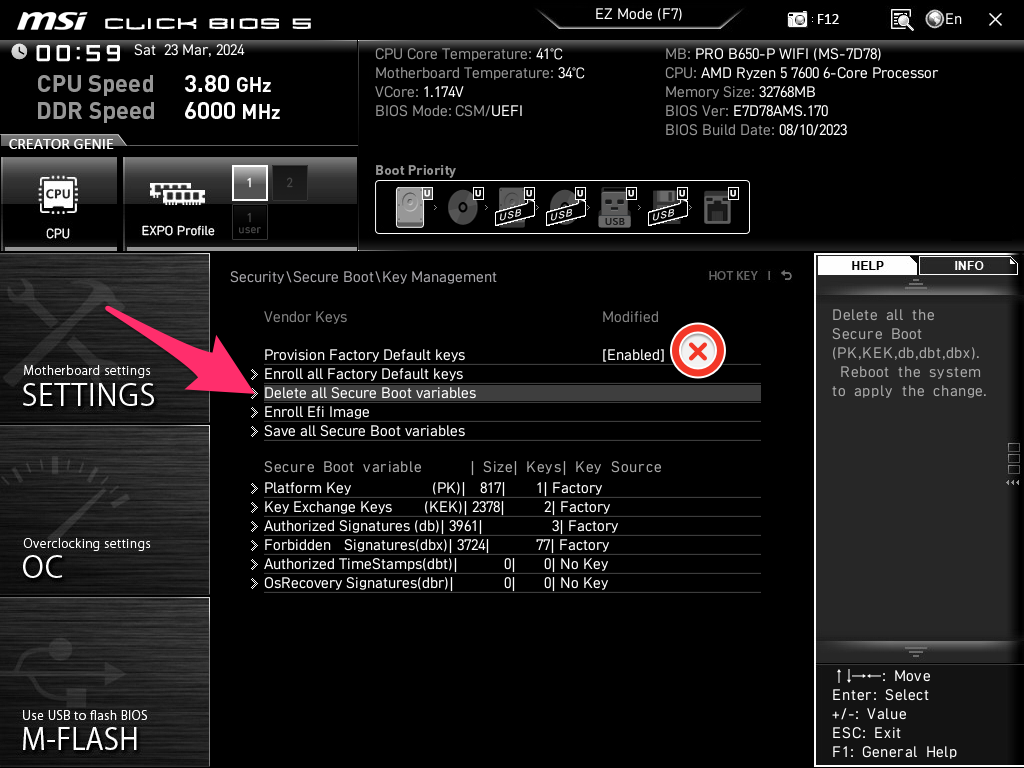
- Enable Secure Boot.
- Set the Secure Boot mode to Custom.
- Put the platform in Setup Mode by clearing existing Secure Boot keys (i.e., delete all Secure Boot variables).
📸 Example Screenshots:
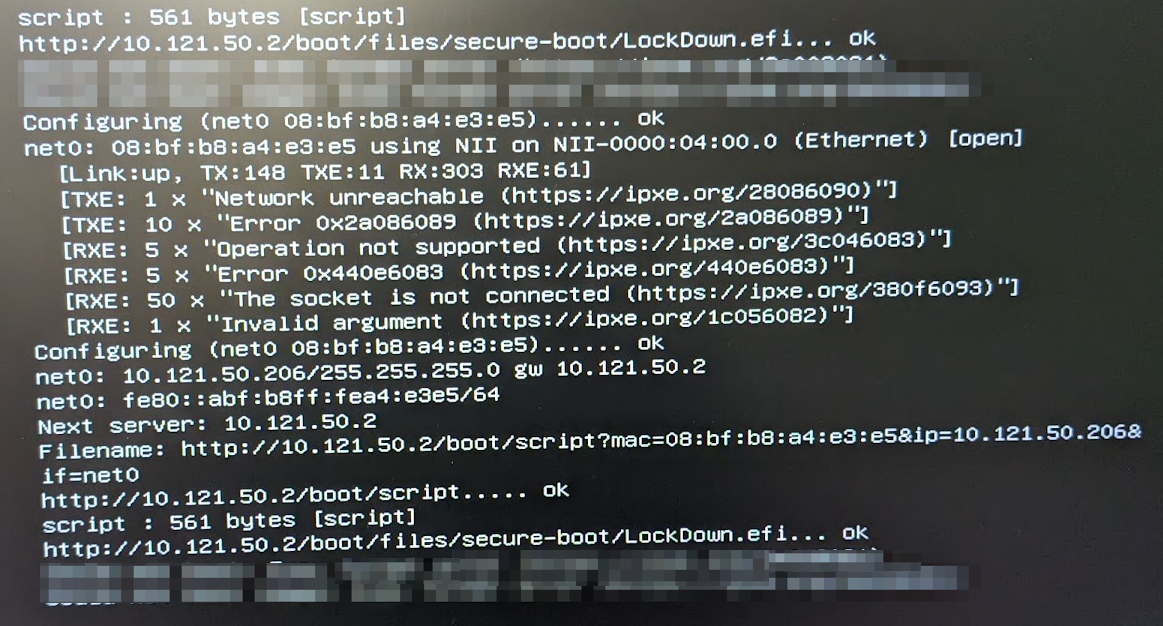
4. Auto-Enrollment Process
- Reboot the PC.
- During the next boot, the Secure Boot certificates will automatically install.
- Reboot again. You will now see a shield icon in the ggRock UI, indicating Secure Boot is active. 🛡️
📸 Example:

🔁 Finalizing the BIOS Configuration
Once Secure Boot is confirmed:
- Disable Secure Boot Keys Auto-Enrollment in
Settings > Secure Booton ggRock. - Reboot the PC.
- Re-enter BIOS setup (
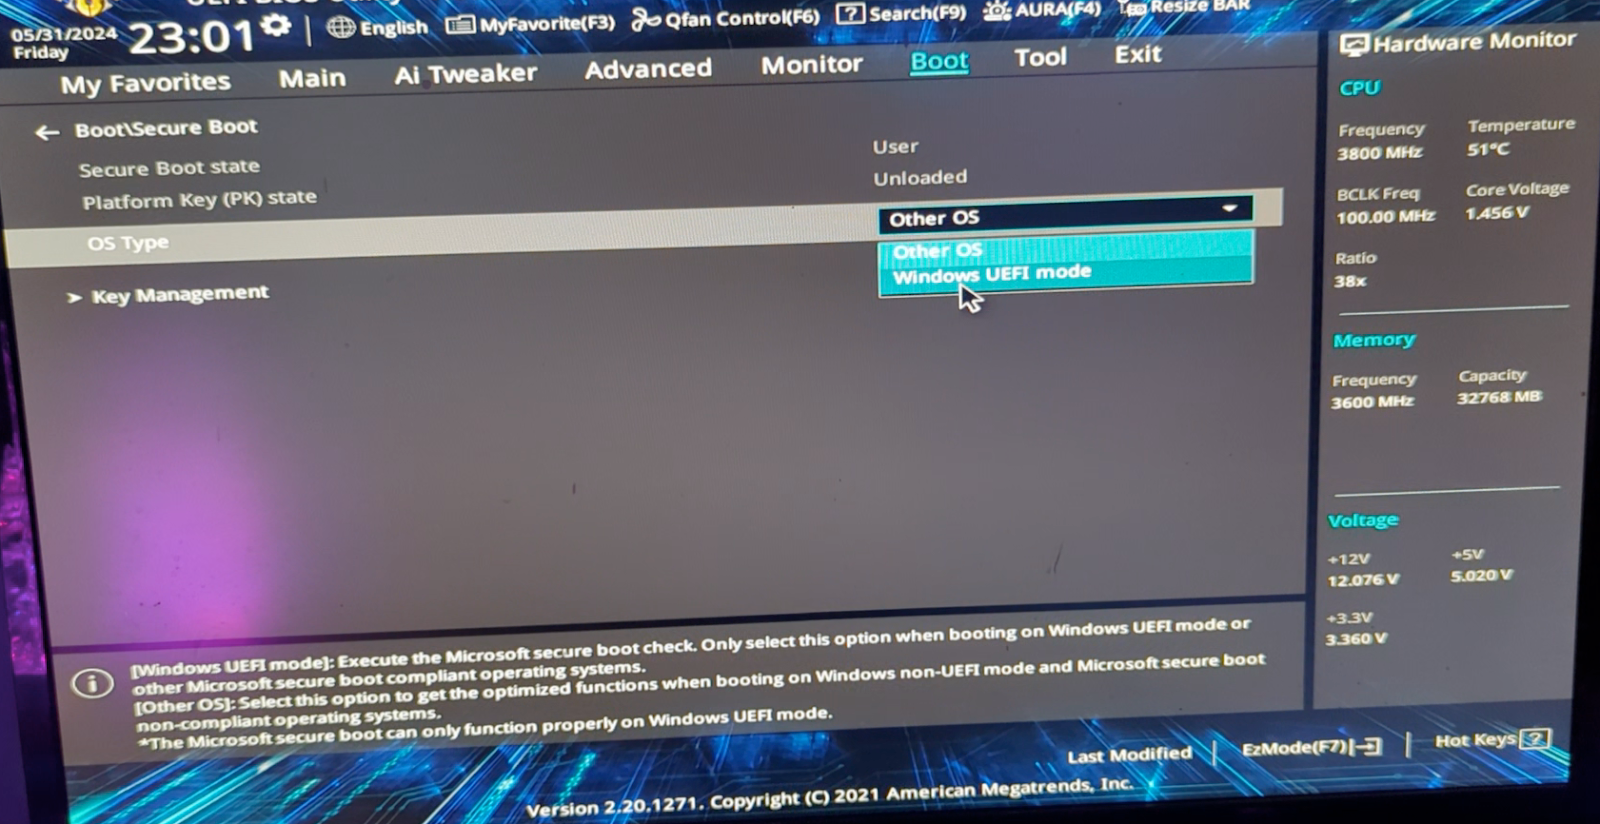
F10,ESC, orDEL). - Go to Boot Options.
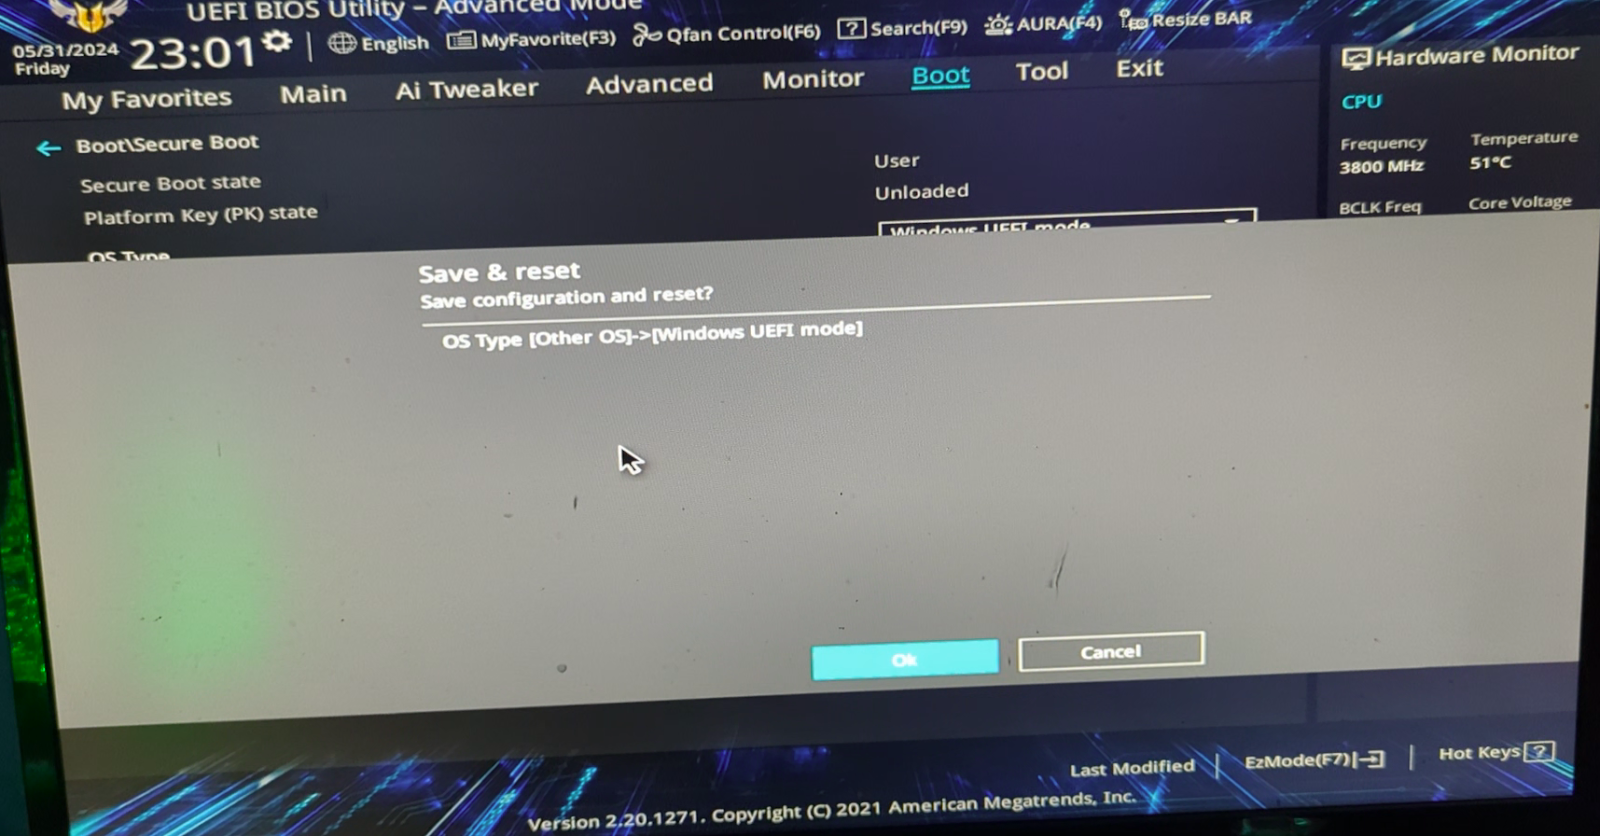
- Ensure Secure Boot is enabled (may be called “Windows UEFI Mode” on some systems).
- Save changes and exit BIOS.
📸 Example:
🧪 Verifying Secure Boot Status
There are two ways to verify that Secure Boot is correctly configured:
Method 1: msinfo32
- Boot into Windows.
- Press
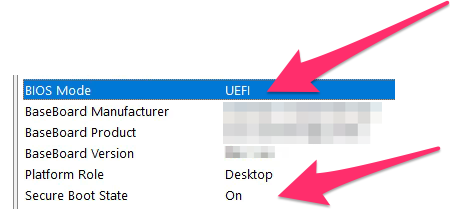
Win + R, typemsinfo32, and press Enter. - Look for:
- BIOS Mode: UEFI
- Secure Boot State: On
📸 Example:
Method 2: PowerShell
Run the following command in an elevated PowerShell window:
Confirm-SecureBootUEFI
If it returns True, Secure Boot is active. ✅