

 Español
 中文
 العربية
Security
Security Policy
Location: Settings ▶ Client configuration ▶ Security Policy
Control exactly what your clients can—and can’t—do by grouping PCs into custom security-policy sets.
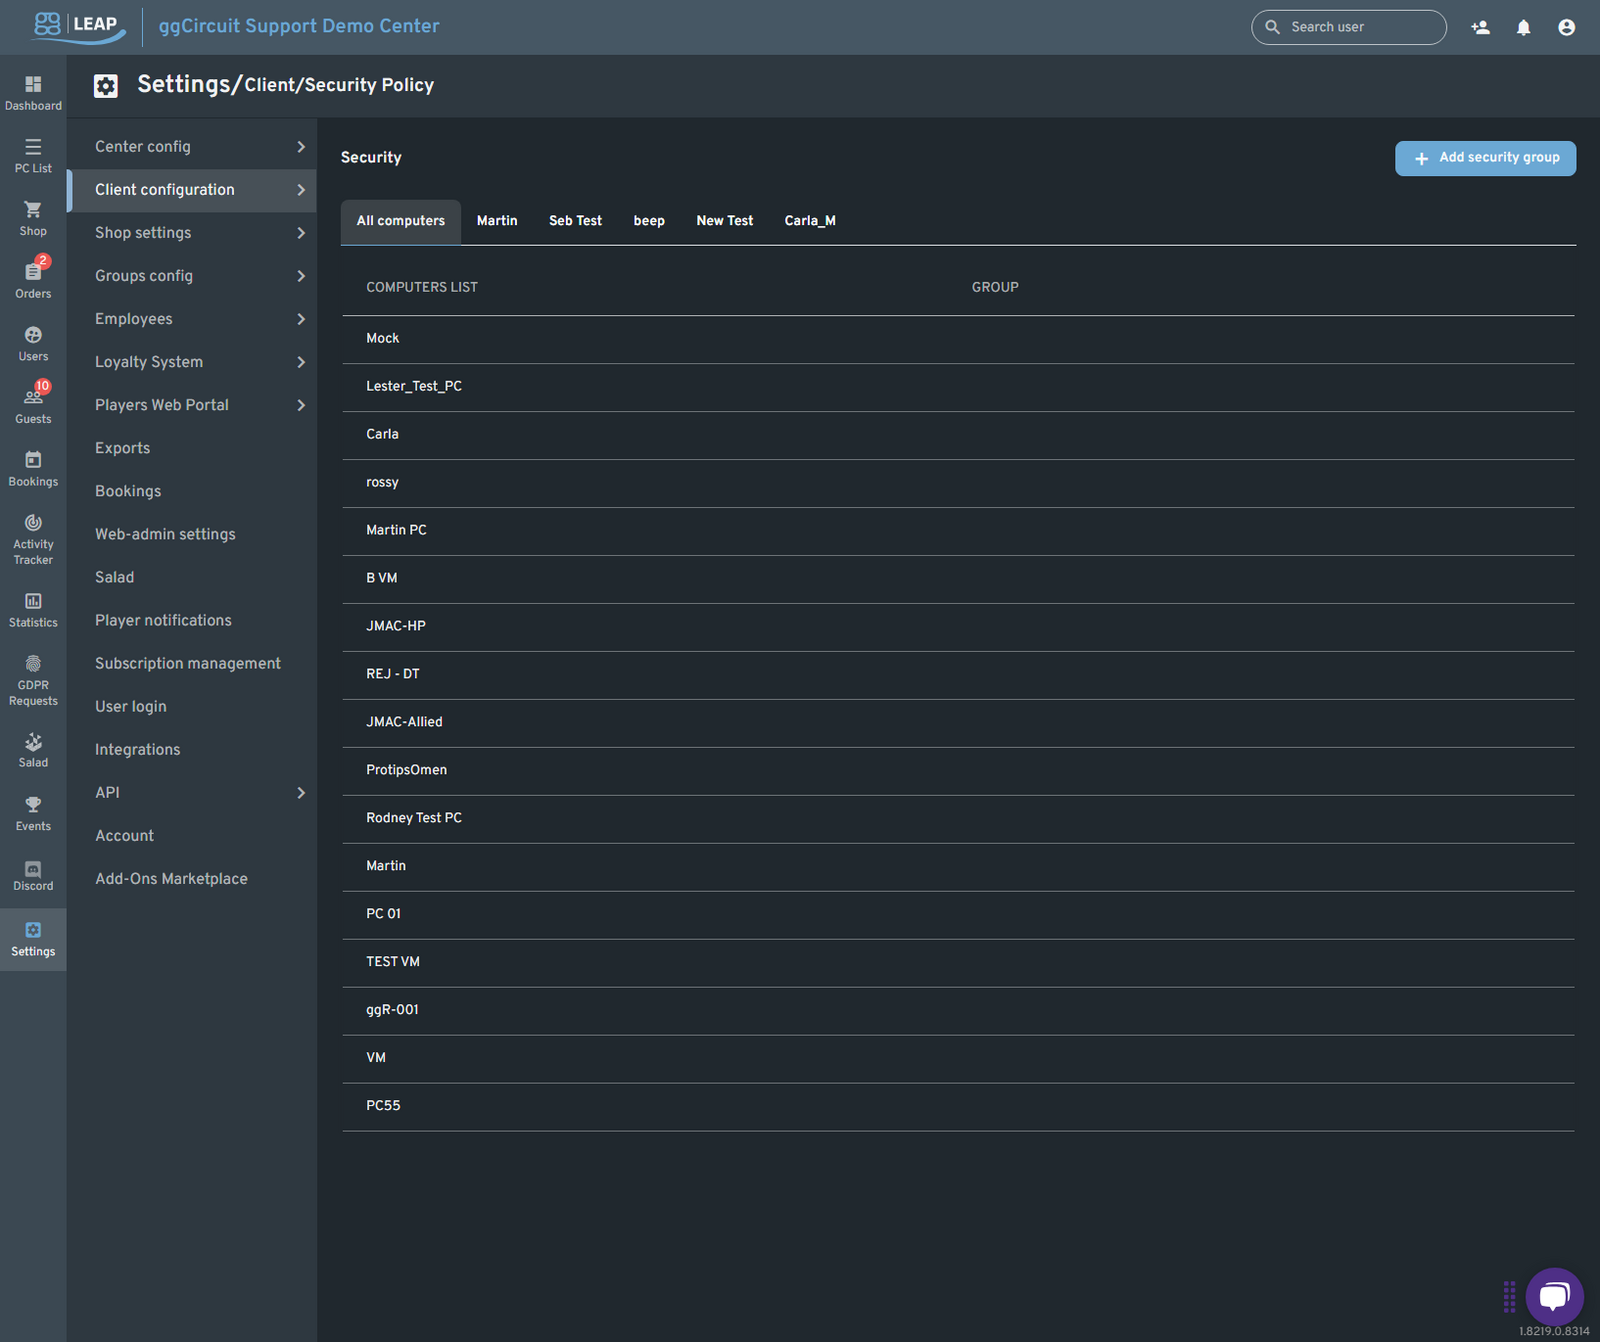
6.1 Policy Groups
- Tabs
Each security group (for example: All computers, Martin, Seb Test, etc.) appears as a tab. - Computers list
Shows every PC in your venue and the group it belongs to. - + Add security group
Create a new policy group and assign machines to it.
To rename, edit, or delete a group, click the ⋮ menu on its tab.
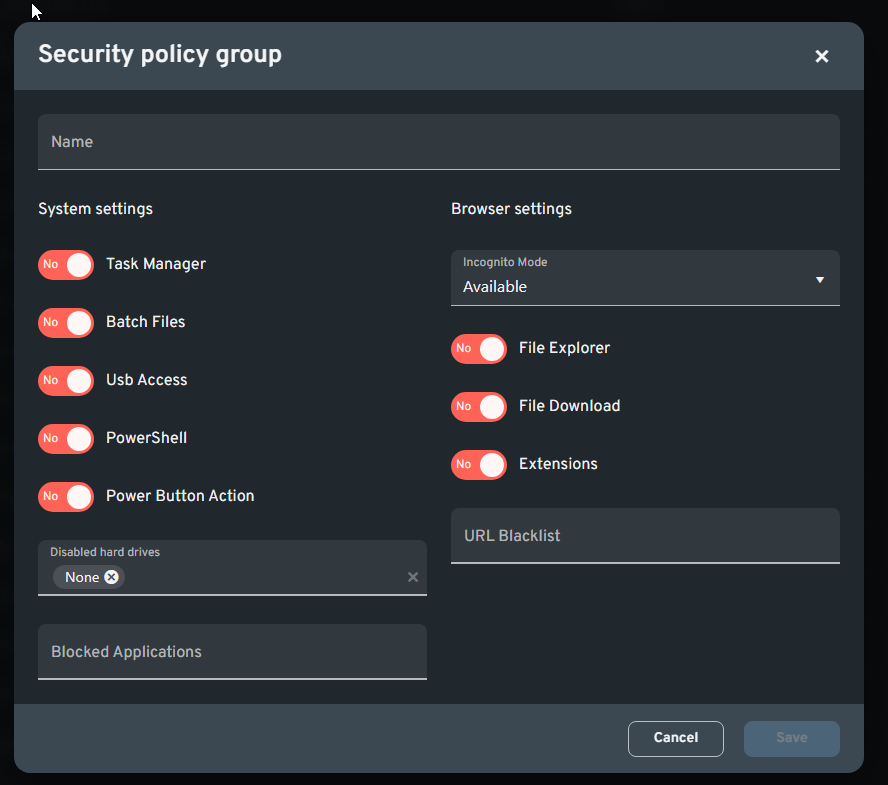
Security Policy Group Settings
When you click + Add security group (or edit an existing one), you’ll see:
▶ System settings
| Toggle | Effect |
|---|---|
| Task Manager | 🚫 Block access to Windows Task Manager |
| Batch Files | 🚫 Prevent execution of .bat & .cmd scripts |
| USB Access | 🚫 Disable removable‐drive / USB mass-storage access |
| PowerShell | 🚫 Block PowerShell console & scripts |
| Power Button Action | 🚫 Disable or override the physical power button behavior |
| Disabled hard drives | Select specific drive letters (C:, D:, etc.) to block |
| Blocked Applications | List additional .exe filenames to block at the OS level |
▶ Browser settings
| Control | Effect |
|---|---|
| Incognito Mode | Available / Disabled / Forced |
| File Explorer | 🚫 Prevent launching Windows Explorer from inside the client |
| File Download | 🚫 Block file downloads via any built-in browser context |
| Extensions | 🚫 Disable browser extensions (Chrome/Edge) |
| URL Blacklist | Enter domains or full URLs to blacklist for all browser traffic |
- Name your policy group.
- Adjust toggles and dropdowns to lock down or permit functionality.
- Click Save to apply the policy to every PC in that group.
Pro tip: Use fine-grained groups (e.g., Guest PCs vs. Staff PCs) to tailor restrictions per audience.